


High Power LEDs are driven at higher drive currents and have high light output. LEDs may be cool on the outside, but because of this increase in power running through them, their internal (junction) temperature will increase with use. We have talked about finding an adequate heatsink for your LED set up which helps to transfer the heat from the LED to an outside surface. This will lower the junction temperature of the LED, keeping it running bright and degrading at a much lower rate, for much longer LED run time. However, in order to make this transfer of heat more efficient, it is a very good idea to use a thermally conductive epoxy or compound in between your LED and heatsink. This will create a thermal path in which the heat can easily move away from the precious diode, to your heatsink, which then will be passively cooled by the surrounding elements or actively cooled by a fan.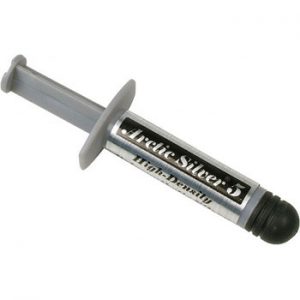
Now in the world of thermal compounds and adhesives it is pretty easy to get trapped into buying a low-quality product. Here at LEDSupply, we realize the importance of these thermal materials which is why we carry Arctic Silver thermal compounds and adhesives. These quality products have great thermal conductivity and I would recommend using in any LED project, especially if you are running the LEDs at 1 Amp (1000mA) or more. Let me tell you this, the couple bucks extra that you spend on this will more than make up for this in the long run as it will result in better LED performance and much longer lifetime.
Do LEDs Need Thermal Epoxy or Compound?
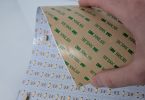
Now you might be wondering if you need an epoxy or a compound for your setup. We carry two kinds of Epoxies/Adhesives that work as a heat conductor but are also made to adhere your LED to the heatsink surface. Thermal Epoxy is primarily used when there is no other way to mount the LED. Some people will use thermal tapes for applications like this which is adequate enough for lower drive currents but we will show the downfalls later in this article.
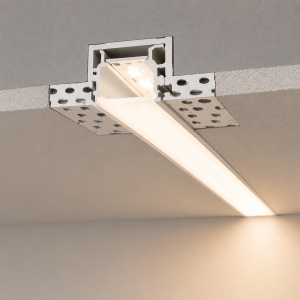
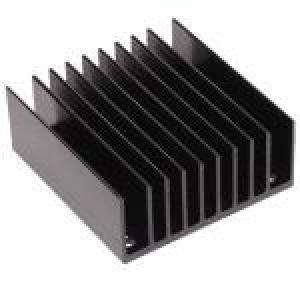
If you are mounting your LED to a heatsink using screws, for example with the MakersLED heatsink (below), you will want to use the thermal compound as opposed to the epoxy. It wouldn’t hurt to use the epoxy on an application like this as it would still transfer heat fine, but part of the upside of mounting LEDs with screws is that you can easily change them out when needed. With the thermal grease compound, a thin layer goes in between the LED and heatsink before you bolt it down. This layer will not hold the LED there, but just help create the best thermal path.

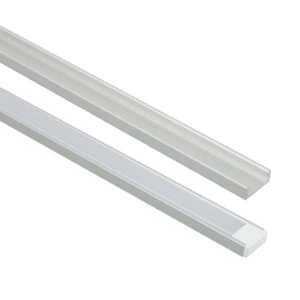
Thermal Compound works best when mounting your LED Star (MCPCB) with screws.
2-in-1 Thermal Adhesives
Arctic Silver makes two different types of adhesives for thermal joints in minimum bond line applications. These adhesives work great in adhering our LED star boards to the surface you need. They actually utilize a two-part system, in which you use a 1:1 ratio of each part to mix and then spread over the back of your LED star in order to stick to your heatsink.
Mixing the two parts is a pretty simple task; they provide a mini spatula that works in blending and spreading the application. Once mixed together, you have 5 minutes to spread it before the material starts to harden and settle. That is more than enough time to spread on an LED star so don’t rush, the last thing you want is to make a mess, not spread it thoroughly and have a bad bond. More detailed instructions for each epoxy can be found below.
Arctic Silver Thermal Adhesive
If you need a premium thermal adhesive for your high power LEDs, this is your #1 option. Arctic Silver is a fantastic thermally conductive epoxy mainly due in part to the fact that it is made with  99.8% pure micronized silver. Silver is a fantastic heat conductor so with such pure silver content that makes up about 65% of the adhesive in terms of weight, it is no wonder why this is the top choice.
One thing to note with the silver adhesive is that it is formulated to conduct heat, not electricity. That being said, the silver particles can conduct electricity under heavy pressure so you should do your best to keep away from electrical traces, pins and wire leads. This shouldn’t be a problem but is an added precaution during use.
An Arctic Silver Thermal Adhesive set consists of two 3.5 gram syringes for a total of 7 grams of thermal epoxy. These tubes, marked ‘Part A’ and ‘Part B’, are mixed in a 1:1 ratio with the included mixing wand.
Arctic Alumina Thermal Adhesive
Arctic Alumina is a thermally conductive epoxy that is a pure electrical insulator. Unlike the Arctic Silver, this has no chance of conducting electricity. So if you were worried about a lot of pressure in your application that will pack those silver microns tight enough to become conductive, you can put your mind to rest with the Arctic Alumina. Although the thermal properties aren’t as great as the Silver, it will have no chance of messing with you on the electrical side.
The epoxy is a layered composite of aluminum oxide (known as Alumina) and boron nitride. There is a two-part system, just like Arctic Silver. Alumina comes in 2.5g syringes for a total of 5g of adhesive. Although this is lighter than the Arctic Silver (7g), you still get the same volume (3cc) and might even be able to cover more area as Alumina has a lower consistency.
How to Use Thermal Epoxy on Your LEDs
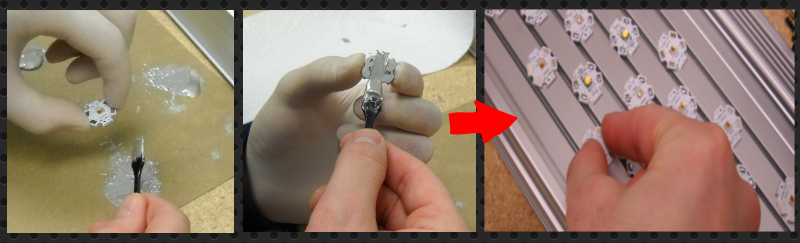
- Clear both the surface of the heat sink and the back of the MCPCB of any old adhesives or obstructions on the surface. Clean and wipe down to remove any grease or dust particles.
- Arctic Silver/Alumina adhesive works with a 1:1 ratio, meaning equal amounts of Part A & B. It is important that you stick to this ratio as it will make for a better bond over time. Put an even amount of each on a mixing surface and use the wand to mix them. Be sure to only get the amount you need as this adhesive has a pot life of 3-5 minutes at room temperature and you don’t want to waste any by letting it dry up unused!
- Use the mixing wand to spread a thin, even layer over the back of your MCPCB.
- Press MCPCB firmly onto heat sink surface and clamp or apply weight to the bond so it becomes stronger. If using clamps, use wax paper in between the MCPCB surface so as not to ruin any connections or the light emitting diode.
- Wipe adhesive remnants away from the star board and keep clamp on for up to 60 minutes for best bond. After that, remove clamps and admire your work.
**Manufacturer’s Directions and Warnings: Arctic Silver, Arctic Alumina
The Thermal Compound: Arctic Silver 5
 Arctic Silver 5 is a high-density poly-synthetic silver thermal compound similar to Arctic Silver Thermal Epoxy without the adhesive materials. The compound has 3.5g of a mixture made with micronized silver, sub-micron zinc oxide, aluminum oxide and boron nitride particles. The thermal paste uses three unique shapes and sizes of pure 99.9% silver particles that maximizes particle-to-particle contact area which makes for a larger thermal path and better transfer of heat!
The combination of this silver with the thermally conductive ceramic particles creates a high level of performance and stability. This is perfect for strengthening the bond between your MCPCB (star board) and your heatsink. This compound will not hold the LEDs in place so this type of compound is used when you are using screws to hold the LED down. If you are using screws, you should always be sure to use plastic washers in between the screw and the MCPCB to minimize contact and damage.
How to Correctly Use Thermal Compound on Your LEDs
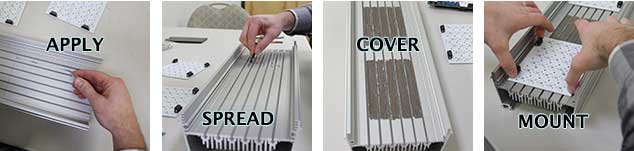
- Take a needle and poke a hole in the top protective covering of the syringe so that you can apply the grease.
- Put a small amount on the heat sink where your LED board will go. Start out small so you aren’t wasting the grease, apply more if you need it in the spreading process.
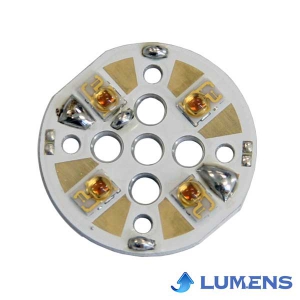
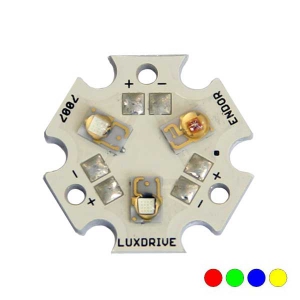
- Spread a thin layer of the grease all over the surface that will be covered by the LED board. In the pictures we are using a large LED board so we have a large area to cover.
- Once you have a coating of grease over the surface, place your LEDs on, pressing lightly, and let sit.
Arctic Silver’s Three-Phase Viscosity
The three thermally conductive pastes above all use a unique mixture of advanced poly-synthetic oils that work to provide three different functional phases. These three phases make Arctic Silver’s products stand out as it makes application much easier and maximizes cooling efficiency over the life of your LED(s).
The first stage starts when the thermal material first comes from the syringe. The consistency is thin and engineered for easy application, making spreading it around on your heatsink a breeze. This initial phase has a cure time of about 5 minutes, you should plan on spreading it and placing your LED in under that time so it doesn’t harden before you have the LED in place. The second phase starts after you place your LED star and during the LEDs initial use. This stage allows for the thermal paste to thin even more, filling in the microscopic valleys where the surface is not covered. This stage ensures that there is the best possible contact between the heatsink and LED. In the next 50-200 hours of use, the material will thicken into its final consistency that is designed for long-term stability. This is the stage that adhesives will harden even more and make the best possible bond.
Thermal Conductivity
This is what ultimately matters most when discussing thermal adhesives and compounds. It is important to know how the epoxy or compound conducts heat. Once we know the rate that the material will pass heat through, we can compare the options and find the best. In the opening of the post I mentioned that many people will try to use lower quality product or thermal tape for their applications. This isn’t necessarily wrong, especially if you are running at lower drive currents. LED tape can be great for LEDs running up to about 700mA, but once you go up from there I would recommend using adhesives instead. The tape might be much easier in terms of setting up and replacing LEDs in the future, but it lacks in how well it conducts heat.
Thermal conductivity is measured in Watts per meter Kelvin. Broken down, it is the number of heat units (Watts) that flow during a unit of time through a sectional area (square meter) when the temperature falls a degree (Kelvin) per unit length (meter) of its path. Now I could try to explain this for hours, but in hopes of not confusing you (and myself for that matter), it is basically the rate at which heat can pass through material. Higher numbers represent better heat transfer ability as this means more Watts can move quicker through the same amount of contact area.
The thermal conductivity of air is .024 W/m-K…not very impressive, which is why you need a proper heatsink and a thermally conductive paste for your LEDs. Thermal tape will vary by type but tends to be around .2-.25 W/m-K, so about 10 times better than air. This isn’t bad for some smaller applications but if I am doing a large project and want to guarantee I’m not going to have to go back and fix my LEDs months in the future, I’m going with one of the Arctic Silver products.
There is no thermal conductivity data that I could find for Arctic Alumina adhesive, but the company makes an Alumina compound that is >4 W/m-K and I’m going to guess the adhesive sticks around around that as well, so this adhesive is about 75-100x better than air.
The silver based products are the best heat conductors. If you need an adhesive, the Arctic Silver Thermal Adhesive is advertised as >7.5W/m-K (300x better than air). The Arctic Silver 5 compound boasts the best thermal conductivity. Remember this can only be used if you have another way of mounting the LED, as with screws or an external mounting system. The compound at a .001 inch thick layer calculates to 8.89 W/m-K…around 340x better than air!!
Conclusion
By looking at the thermal properties, it is easy to see that Arctic Silver products are far more efficient at moving heat than other options. For LEDs, the lower the temperature, the brighter and longer they will run. LEDs will degrade much slower at lower operating temperatures, meaning it could mean years of difference in run times if you decide to go with Arctic Silver Thermal Adhesives or Compounds. If I am using High Power LEDs, it is a no brainer to me to use these products to maximize thermal transfer and ultimately the quality of light and lifespan of these amazing light sources.
Alternative Uses for Thermal Adhesive and Compound
Here at LEDSupply our focus is obviously on LED components and really anything that can make the setup and use of LEDs easier. That is why we focus on thermal adhesives and compounds in terms of their uses with light emitting diodes. However, there are actually many uses for thermal adhesives and compounds.
One of the most common uses is to transfer heat from CPU cores to heatsinks within a computer. This is done in pretty much the exact way you would apply the thermal paste to LEDs. The compound or adhesive will increase contact area by filling up the small valleys not filled in between the processor core and the heatsink. Processors will always run hot with use so providing an adequate thermal path is just as important for computers as it is for LEDs! CPU manufacturers usually will include thermal paste with their products, like Intel, but other than what they send you with the chip, there is none available commercially. There are many off brand names and other options but Arctic Silver is the best option available to the public.
Lastly, for all you gamers out there, this product could save that old Xbox of yours! The ‘Red Ring of Death’ has long been a notorious end sign for your consoles life. Now with this compound, there is actually a method to saving your system and keeping it running! Thermal Adhesives and compounds have more uses than you may have thought; they will help transfer heat in a variety of applications, and for heat sensitive applications this can mean all the difference.