


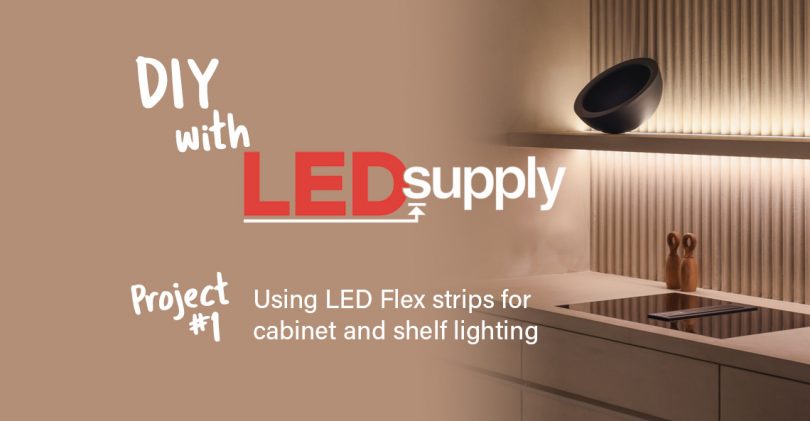
This step-by-step DIY shelf lighting post will utilize all the benefits of flexible LED strip lights.
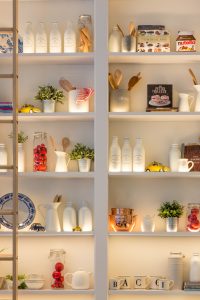
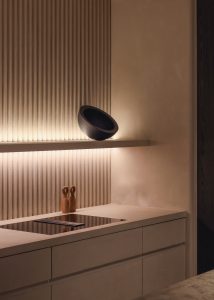
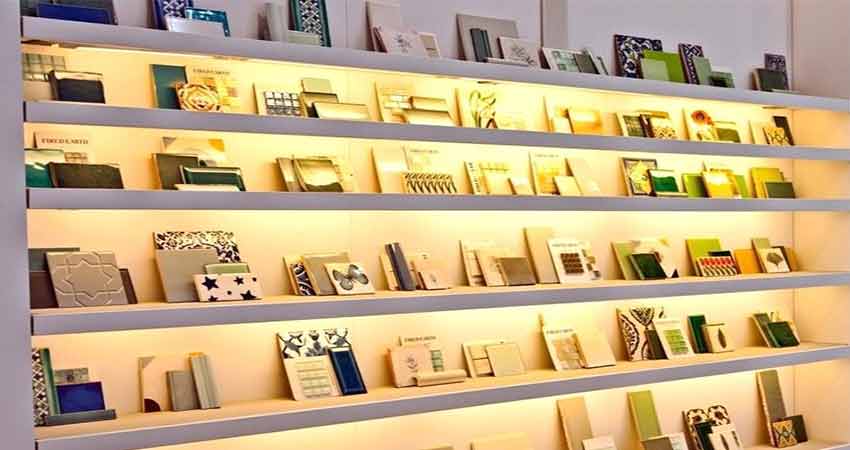
Shelf lighting is a fantastic architectural lighting style that adds indirect soft light to a room as well as highlights a feature within the room. Here we will help you learn how to use flexible light strips to highlight your shelving and enhance your area.
Project Overview
Skill Level:
EASY
Estimated Time:
1-5 HOURS
Cost:
$25-$250
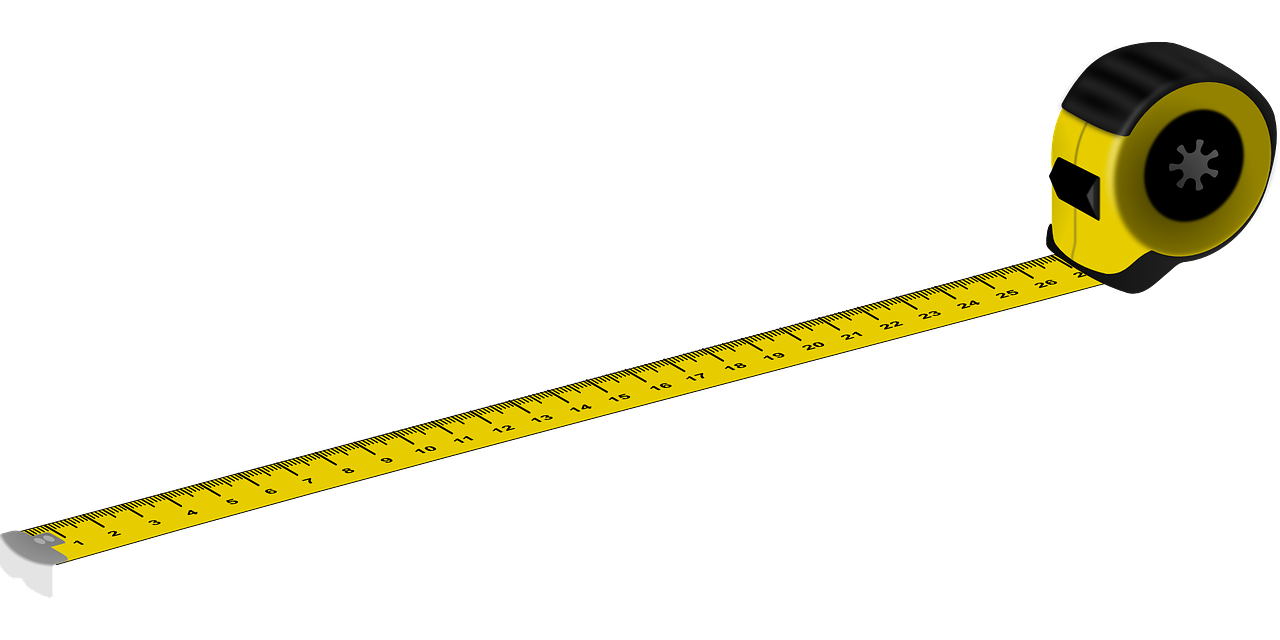
Tools & Materials
Tools
- Scissors
- Tape Measure
- Wire Strippers
- *Optional: Solder Iron & Solder
LEDSupply Materials
- LED Flex Strips
- Power Supply (options linked below)
- 20AWG Extra Wire
- EZ Strip Connectors
- *Optional: LED Strip Track
NOTE on connecting DC LED Strips to AC House Voltage
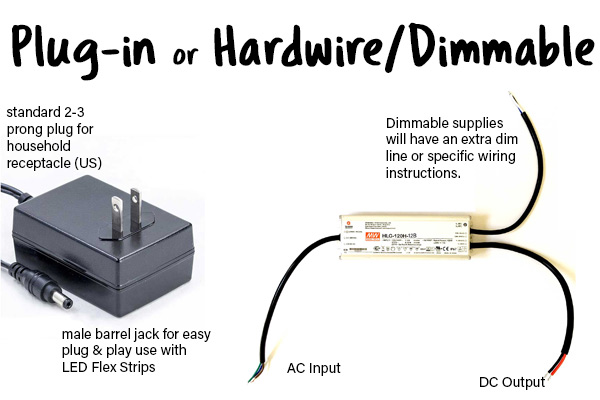
There are two different ways to connect to 110VAC line voltage. The easiest method is to use a switching power supply that can plug directly into a standard wall outlet. You know, like the type that powers your laptop.
The Mean Well GST, for example, is a desktop power supply that plugs directly into a common household receptacle and the opposite end has a barrel plug connection that can be plugged directly into your LED flex strip.
The second method requires direct wiring (hard-wiring) to 110V line voltage with a power supply. When working finished products into a home, customers usually do not want the lights to be plugged in, but rather hidden and out of sight. These power supplies will hook up directly to 110VAC and then convert that to 12VDC to safely light your LED Strips. **Please make sure to keep up to your local electrical code when installing power supplies
In this guide, we will go over how to connect everything as well as how to add a dimmer or make separate connections if needed.
Step by Step Instructions

Step 1: Determining Length of Strip Needed & Wattage
Don’t make this part rocket science. Each project will take some easy planning and calculations. This is because all houses have different needs and dimensions, LED strip projects are rarely a “one size fits all” instructable. Here are some key pointers to remember in order to keep yourself from becoming overwhelmed in this step.
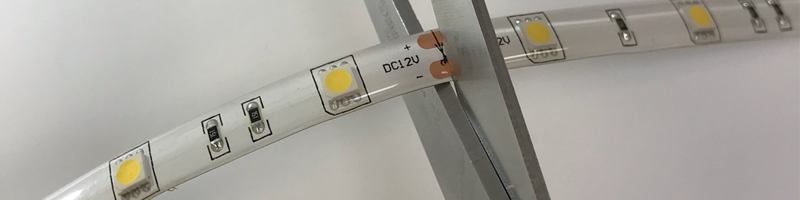
- The wattage of the strip you are running. We used Standard Density 12V Flex strips for this project which operate at 7.2 Watts/Meter. There are detailed wattage tables on every strip product page.
- The voltage of the LED strip = 12VDC
- Wattage = Volts x Amps
The first step is to determine the number of linear feet of LED strip your project requires. Knowing the length of the strip gives the required information to determine what size power supply is needed. We know from above that each meter of strip consumes 7.2 watts. So, if we have 12 linear feet (roughly 4-meters) then the power consumption will be 28.8-watts. The other known requirement is the output voltage of the power source must equal 12VDC, which gives enough information to figure the amperage.
We know that:
Wattage (28.8) = Voltage(12) x Amps(?)
So, by rearranging the formula to find Amperage we find:
Amperage(?) = Wattage(28.8) / Voltage(12)
By dividing the Wattage (28.8W) by the voltage (12Vdc), we find the minimum amount of amperage required to power 12-feet of strips is 2.4 amps.
This means a power supply that can output 12VDC up to 2.4 amps will work for this project. We highly recommend giving yourself some overhead amperage to work with; so in this example, if I had to choose between a power supply with a maximum amperage of 2.4 or 3.0, I would go with the larger of the two. This will ensure we are not overloading our power supply or running it at the max amperage all the time which is typically frowned upon for any power supply.
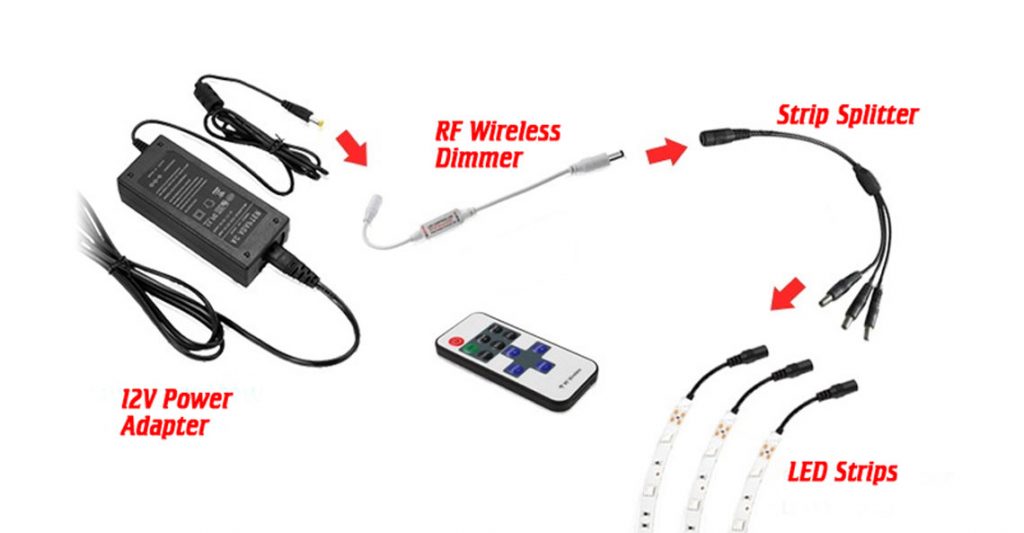
We carry many power supplies that will work for this job, below are the best options for a plug-in, hardwire, or AC dimmable power supplies:
- Plug-in power supply: Mean Well GST Desktop Power Supply
- Hard Wired power supply: Mean Well APV | LPV
- Dimmable power supply: Magnitude Dimmable power supply
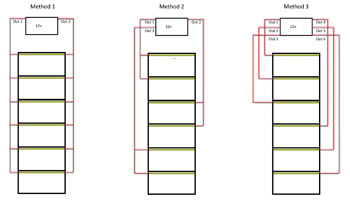
An important consideration to note is the forward voltage drop when working with low voltage DC LED strips. Due to the forward voltage drop, the maximum length of strip running in series is limited and depends on your strip type. For 12V strips, maximum fun lengths are 32.8-feet (2 reels) for standard density and 16.4-feet (1 reel) for high density. If your total length of strips exceeds the maximum run length, then you must power the remaining length directly from the power source. For example, power can’t pass through two reels of the strip and then to a third. Power for the remaining strips must come directly from the power source. This is called parallel wiring and an example is shown below.

Step 2: Decide on Dimming the Lights
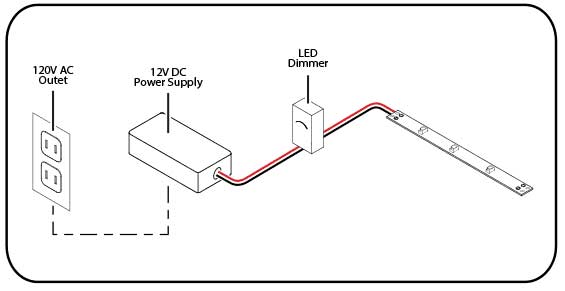
Step 2 is to decide if you want to dim. If not, the 12Vdc output power is connected directly to the LED strips, easy enough.
If you do want the ability to dim your lights, then you have some options to consider.
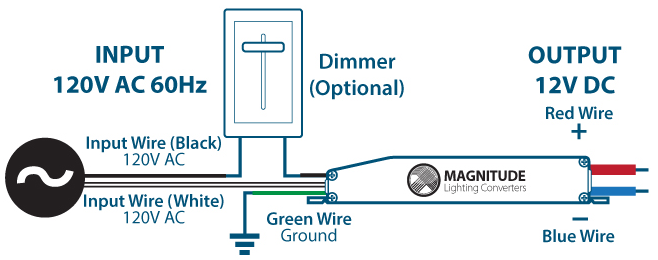
If you already have an AC dimmer or want to operate from a standard wall dimmer already installed in your home then you need to make sure you have a dimmable power supply. Dimmable power supplies usually look just like any other hardwired power source but they usually either have an extra set of wires for dimming or specific hookup instructions to make them work correctly with your dimmer, below is an example.
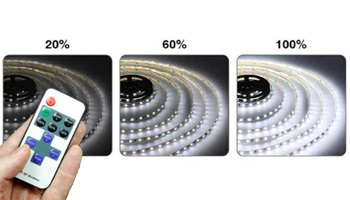
If you want an in-line dimmer, also known as PWM (pulse width modulation), then we have several remote options. These dimmers have a simple receiver unit that goes in between your power source and LED lights, allowing you to then dim from a handheld remote, your phone, or an analog, turn-style dimmer. Take a look here to see our LED controller options.
Step 3: Plan and sketch strip setup
In order to keep a clean-looking setup and do it right the first time, it is important to take the time to lay out your project, determining where each strip length will go and where it will connect to the electrical circuit.
If you have a single shelf or are simply doing under-cabinet lighting then this step will be extremely easy.
When dealing with multiple strip runs or different levels of shelving, however, it is more important to know where your wires will connect, and leave room for them to connect and then run to the next level of lighting.
In this section, you will determine how many different connection points you have. Keep in mind to not go over the max run length for your strip light, but assuming you are under that you can connect the strips in different ways.
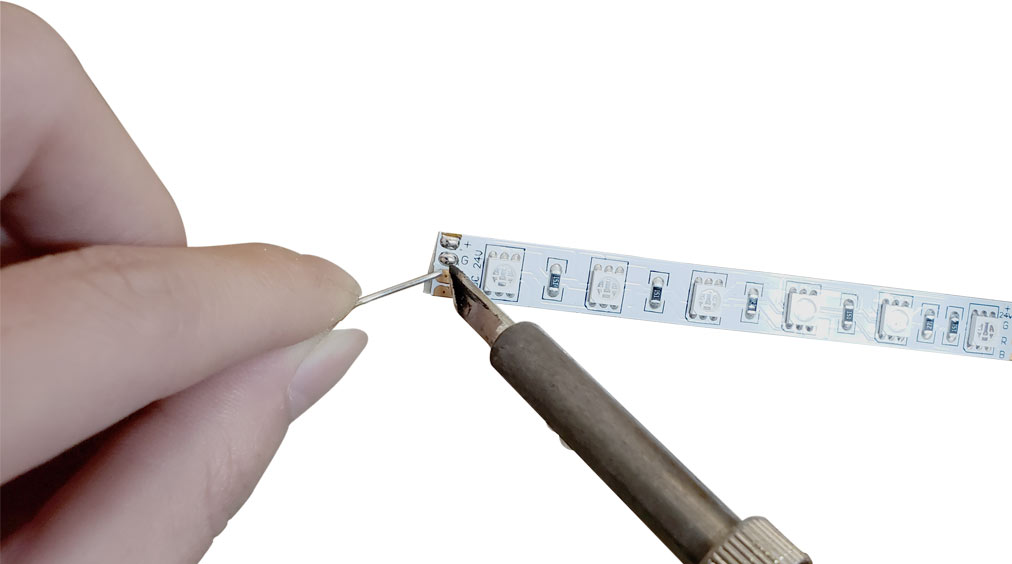
The best way is to solder connections, this is the least obtrusive connection within a strip project but is also the most unappealing for newcomers.
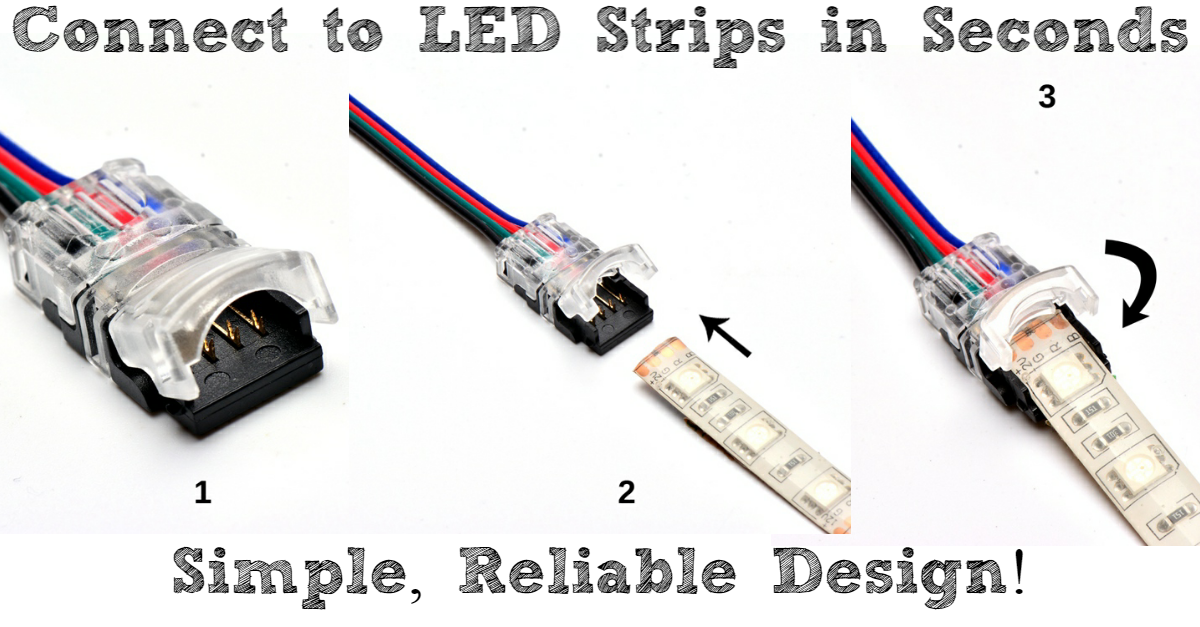
If you are not comfortable with soldering your connections, we have click-on LED strip connectors. These connectors can be finicky but will work great if you use them correctly as in this video.
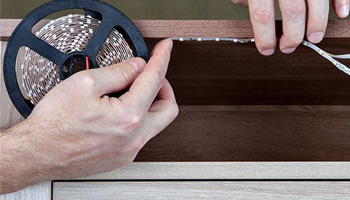
Step 4: Measure and Cut Strips to Length
Alright…Step 4 and it is time to actually get down to the work part of this. That is how it goes with many DIY projects, the planning takes up most of the time if you are doing it correctly.
The LED flex strips from LEDSupply can be purchased in 3-foot increments up to an entire reel which comes to 5 meters (16.4 Ft.). We are the only LED strip supplier that offers custom lengths like this so make sure to take advantage and plan the lengths you buy accordingly.
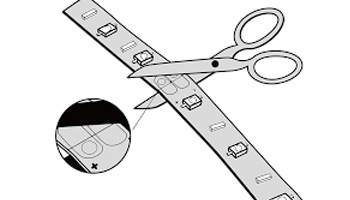
The strips have cut marks every 3 LEDs which comes to every 4-inches for standard density or 2-inches for high. The strips can be cut with normal household scissors, right down the black cut-line.
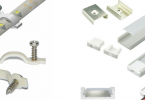
After you have measured and cut out all your LED strips, it is time to add connectors/wire to the end of the strips where power will be passed from one strip to the other. As discussed above, this will be done with either soldering or our EZ-click strip connectors (if you use a mounting track you should replace the EZ click connectors with these low-profile connectors).
You may secure any connections you make with heat-shrink if you would like but it is not completely necessary unless there is a high amount of dust or moisture in the area.
If you need to make any wire-to-wire connections or group in multiple sets of wires we have butt-splice connectors or you can use standard electrical wire nuts.
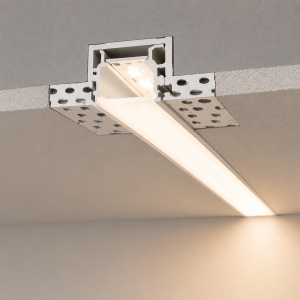
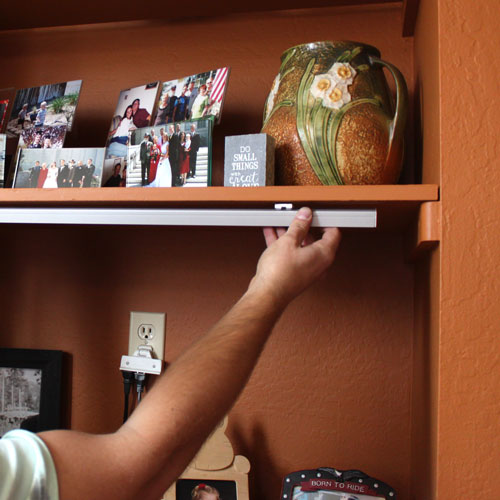
Step 5: Mount or adhere LED flex strips
Finally, we can adhere and mount the LED strips to our shelving/cabinets. The strips come with a strong 3M double-sided adhesive on their backside. Make sure the mounting surface is clean and simply peel the backing off the flex strips and stick the strips to the clean surface. It is best to do this in small increments rather than peeling off the whole tape and trying to apply a long strip light to your desired surface.
Some applications may require mounting clips to keep the strip in place which can be bought in bags of 15 which will get you a good amount of hold.
If you would like a more professional appearance or to angle the light inwards, you may benefit from using our aluminum track for 12V strip lights. This track comes in a straight or angled version and each piece comes with a matching length diffused lens that snaps on over the top. If you use this mounting method you will first mount the strips within the track and then the track to your desired surface with the included mounting clips. Extras can be bought here.
LED Strip Placement: Placement of the strips is more up to your personal preference. If there is a lip on your shelving it is good to place it within an inch or two of this lip to hide the LED strips.
Step 5: Make and Finish Connections
The final step will be to finish off all your connections. Start with making connections between all your strip lengths.
Next, make connections from your power source(s) to the strips. LED strip splitters might come in handy here if you have multiple strips runs coming into one. Otherwise wire nuts or other connection methods will work just fine.
Lastly, make connections from your 110-120VAC to your power supply. If hard-wiring, PLEASE make sure power is turned off when making connections.
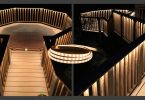
Step 6: Enjoy your new LED accent lighting!