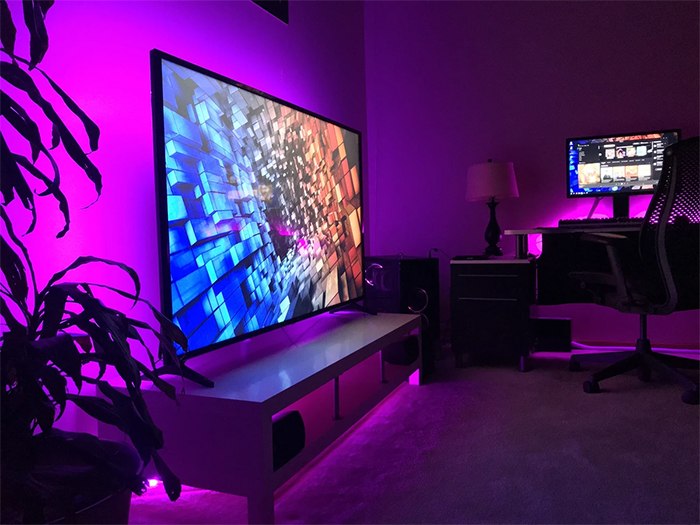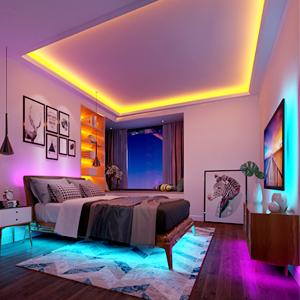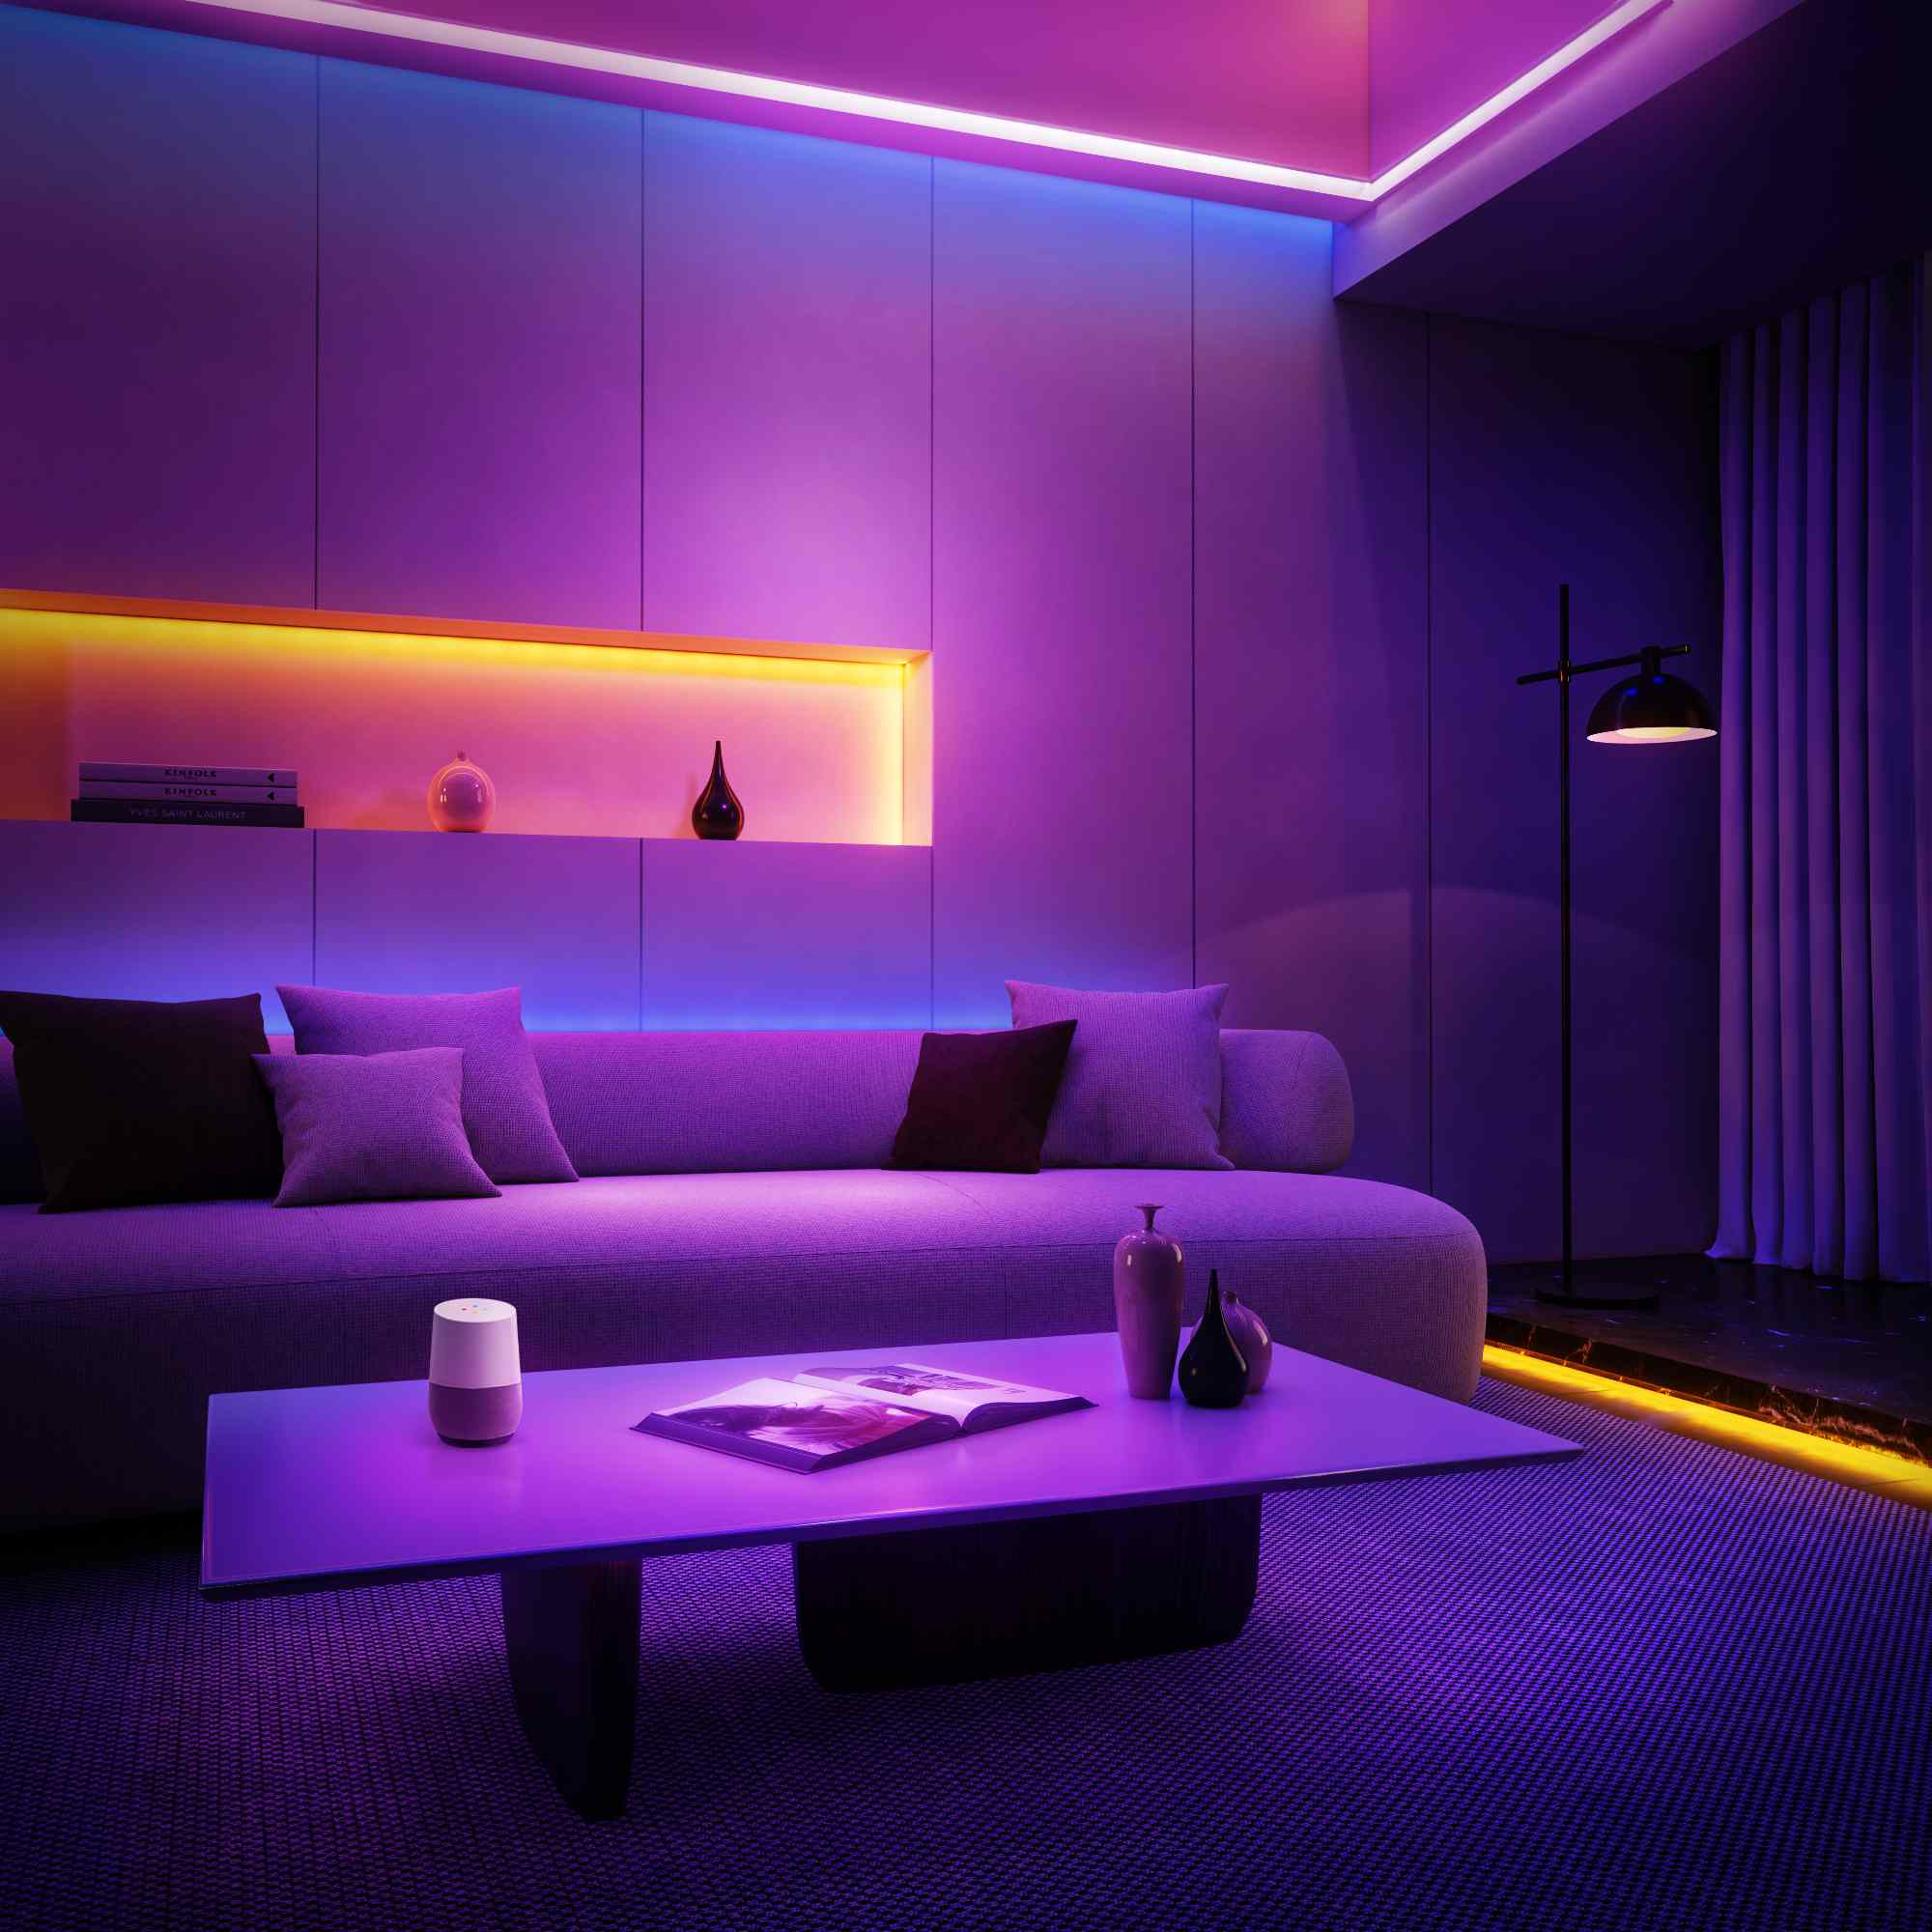


Mood lighting is a popular trend these days. Many people, especially content creators and gamers, install color-changing lights in their bedrooms and living rooms. The most popular in-home DIY mood lighting are RGB strip lights, which are affordable and customizable to your room and application.
This tutorial will take a step-by-step approach to install RGB LED strips throughout your room. A successful LED strip installation just takes a little PLANNING to ensure you have the right length of strips along with a compatible controller and power supply. Then, you can CONNECT the strips with purchased connectors and jumpers or by soldering. Finish by INSTALLING the strips with a few tips from our experts who have helped with thousands of RGB strip projects. All this and more will be covered within this DIY GUIDE to make this process much more manageable.
Tools & Materials
Tools
- Note Pad and Pencil
- Tape Measure
- Scissors
- *Optional: Solder Iron & Solder
LEDSupply Materials
- RGB Flex Strips
- Power Supply (step 3)
- RGB Strip Controller (step 4)
- 20 AWG Extra Wire
- EZ Strip Connectors
- RGB Strip Jumpers
- *Optional: LED Strip Splitters
Step by Step Instructions
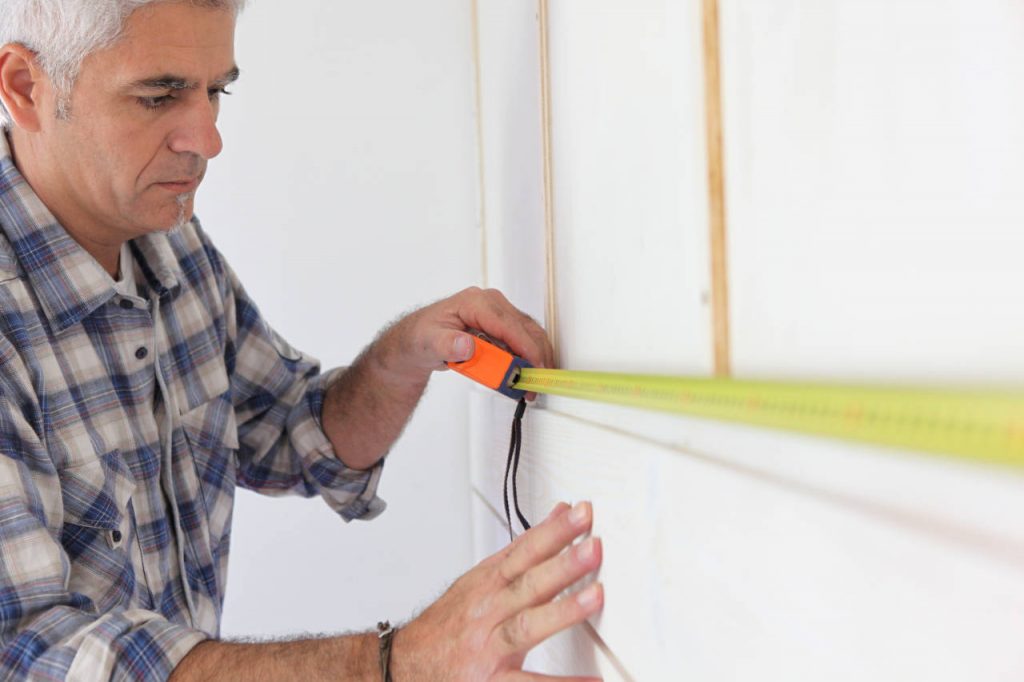
Step 1: Plan out and measure your area
This is where you measure and plan where your strip lights and connections will run. It is crucial to take note of strip runs and the length you need from the power supply to get there. This process can be straightforward if you are just running one strip length. However, most projects require multiple lengths or at least have a couple of gaps or corners to run around. You need to plan for these sections and how you will tie them back together or back to the power supply separately.

Step 1 PRO TIPS
- It is essential to plan out the installation before doing anything else. Draw a rough sketch of the area, noting where the lights will go and where you plan to power them from.
- Be sure to account for the distance from the power to the LED strip start location and the distance between strips. Jumpers or extra wire will be needed to fill any of these gaps.

Step 2: Choosing your RGB Strip
Searching for LED Strip lights can leave you feeling overwhelmed very fast. There are a ton of different options for you to choose from. They can be based on their color, size, density, etc. Within RGB, color-changing strip lights alone, you have a few different “color-based” options:
- RGB, Non-Addressable: Each LED on the strip can display red, green, blue, or all three (white) driven by three input power lines…one for each color. All the LEDs display the same color simultaneously, but the color is altered by varying the voltage applied to each of the three power inputs. This is the type we work with most here at LEDSupply and what is covered throughout this tutorial.
- RGB, Addressable: Same as above, but each LED has a control line, which can be individually triggered for chasing and strobing effects. NOTE: This type is currently under product development but is not offered at LEDSupply yet.
- RGBW or RGBWW: combines single color whites into an RGB strip, allowing even more options. Instead of 3 power lines, there are 4 in this type.
Strip Density
LED Strips vary in density, meaning how many LEDs are placed per foot (or Meter). The common densities we carry for RGB strip lights are:
- Standard Density: 30 LEDS/M
- High Density: 60 LEDS/M
- RGB + White Strip: 96 LEDS/M (alternating RGB/single color diodes)
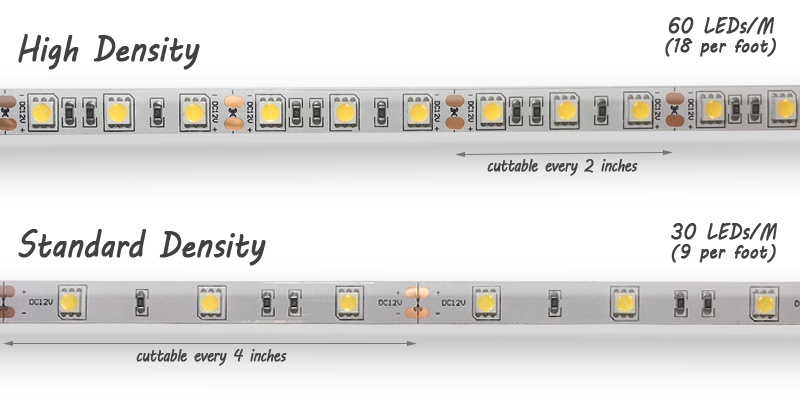
Higher density gives you more light but also consumes more power (more on wattage in Step 3). Most color-changing bedroom applications are better with 30 LEDS/M as you do not want to overdo it with brightness, but you might want to bump up the density with more spacious areas.
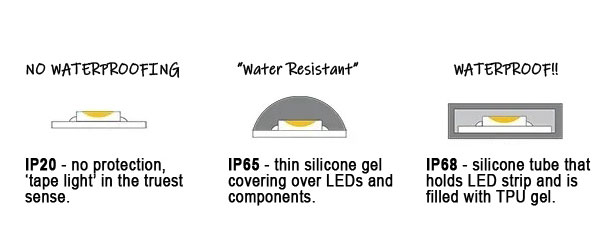
Waterproof vs. Non-Waterproof
Waterproofing the strips depends on your area of application. For example, installing them in a bedroom is a dry area and therefore needs no waterproofing. If you were to install in a bathroom or kitchen area where there might be some moisture, you might want to consider bumping up to water-resistant or waterproof.
Step 3: Finding a Compatible Power Supply
This step is very important and requires some math!
You must know the required input voltage and maximum power consumed by your RGB strip to choose a power supply that will work. Wattage ratings depend heavily on the strip length (step 1) and the strip type (step 2), so you can see why we have to wait until step 3 to get here.
Voltage
Check the strip lights for voltage requirements. Our strip lights here run from 12-24 volts DC, typical for most flexible color-changing strip lights.
Wattage
At LEDSupply, we provide wattage tables on each strip page like the one below. We do this to give you the most accurate wattage estimate so you can specify your power supply as best possible.
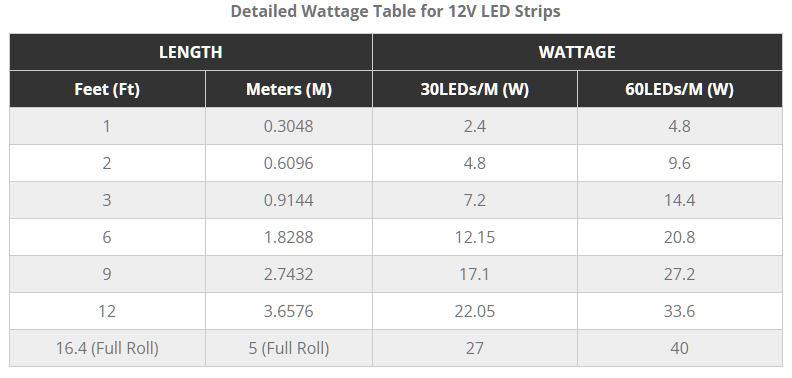
Many manufacturers list strip lights at a singular watt per meter rating based on their stand-alone 1M length. For our strips, that is 7.2W for standard density and 14.4W for high density.
At longer lengths, however, these strips run more efficiently. You can see this in the table as the 9ft. distance is 17.1W and 27.2W, respectively. Nine feet is 2.7432 meters (seen in the conversion in the 2nd column), so we divide these totals by that value and can see that at 9ft. our strips actually run at just 6.23 W/M and 9.9W/M.
You can see how quickly one could overestimate their power supplies by sticking with the static Watts Per Meter value; with LED strip lights, this value is fluid and constantly moving. That is why we created these tables to help YOU, the buyer.
Step 3 PRO TIP
- If you have an in-between number that is not within the table like 14 feet – It is best to calculate this by adding the wattage for the 12ft. lengths and 2ft. lengths so for 30LEDs/M Strip this would be 26.85W.
- If you have multiple small run lengths (<1 ft.) it is best to just stick with the static Watts per Meter number as this will account for all the current you need. As we learned, strip lights run less efficient at smaller lengths.
The 20% Overhead Rule
It is good practice to leave a little extra room for your power supply. Supplies rarely like to be driven at 100% max all the time. To ensure we do not do this, we typically will multiply our strip wattage by 1.15 to 1.2 to get a slightly larger Wattage to look for in a power supply.
So if I were powering the 14 feet from the example above, I would need a (26.85W * 1.2) 32.22 W power supply at the very least.
NOTE on Power Supply Type
There are two different ways to connect to 110VAC line voltage. The easiest method is to use a switching power supply that can plug directly into a standard wall outlet. You know, like the type that powers your laptop.
The Mean Well GST, for example, is a desktop power supply that plugs directly into a standard household receptacle and the opposite end has a barrel plug connection that can be plugged directly into your RGB strip controller.
The second method requires direct wiring (hard-wiring) to 110V line voltage with a power supply. When working finished products into a home, customers usually do not want the lights to be plugged in but rather hidden and out of sight. These power supplies will hook up directly to 110VAC and then convert that to 12VDC to safely light your LED Strips. **Please make sure to keep up to your local electrical code when installing power supplies
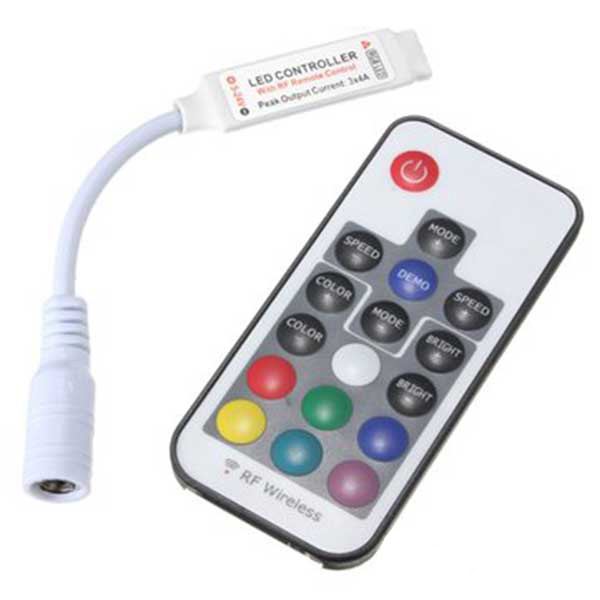
Step 4: Finding an RGB Strip Controller
RGB strips do require a controller to work. There are many controllers available, based on control method and size. Choose to control your strips from a simple handheld remote or perhaps over WiFi with a simple app on your smartphone.
Just like power supplies, controllers have maximum power ratings. You need to ensure that your controller can handle the wattage of your strip lights. To do this, check the max amperage of the controller. Multiply this by your input voltage, and you will have the max wattage the controller can handle. (sometimes, the amperage will be listed per channel, RGB strips have three channels, so multiply this number by 3 to have a rough idea of the max amperage it can handle)
The below table shows the RGB controller options from LEDSupply:
| Product | Input Voltage | Max Amperage | How to Control? |
|---|---|---|---|
| RGB Strip Controller | 5-24VDC | 6A | RF handheld remote |
| High Wattage RGB Controller | 12-24VDC | 24A | IR handheld remote |
| Bluetooth RGB Controller | 5-24VDC | 12A | Bluetooth connection w/ Phone App |
| Wifi RGB Controller | 5-28VDC | 12A | Wifi connection w/ Phone App |
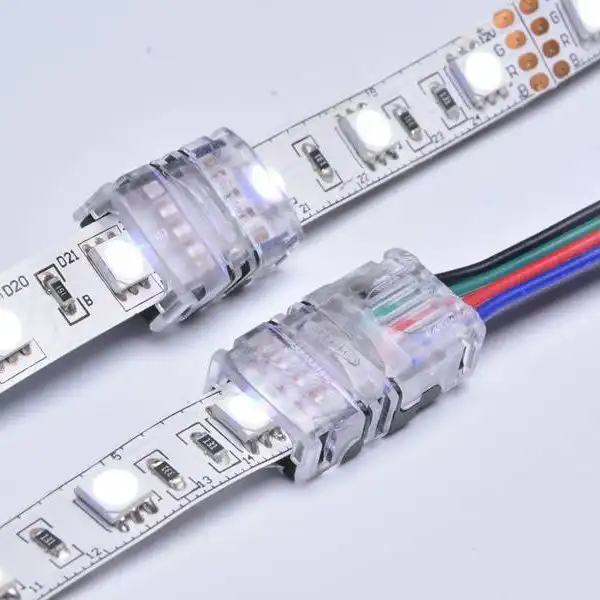
Step 5: How to join LED Strips together?
When installing RGB strip lights throughout your room, cutting and connecting two or more strips is easy.
There are two ways to do so; using a connector or soldering them together. Soldering is always the top option as it provides the most permanent connection. However, the connectors these days are far advanced from what we used to work with.
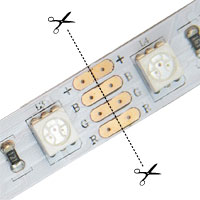
When you cut an RGB strip along the cut marks, you are left with a flat end with four connection points (those small copper pads):
- +12V: this is the shared positive line among the three colors on the strip.
- R: The red control line
- G: The green control line
- B: The blue control line
These four lines are fed from your controller at the start of the run, so they need to keep running to the end of your strip run so that all your strips match up in color. This is your ONE WARNING to ensure you do not cross your wires; using a 4-conductor wire in between is usually the best method.
RGB connectors have 4-pins on the strip side that will pierce through those copper solder pads and make a secure connection. On the other end is where you slide in the corresponding wire, once you make sure the wires are in their correct slots you can clamp it down and the connector will make a secure connection.
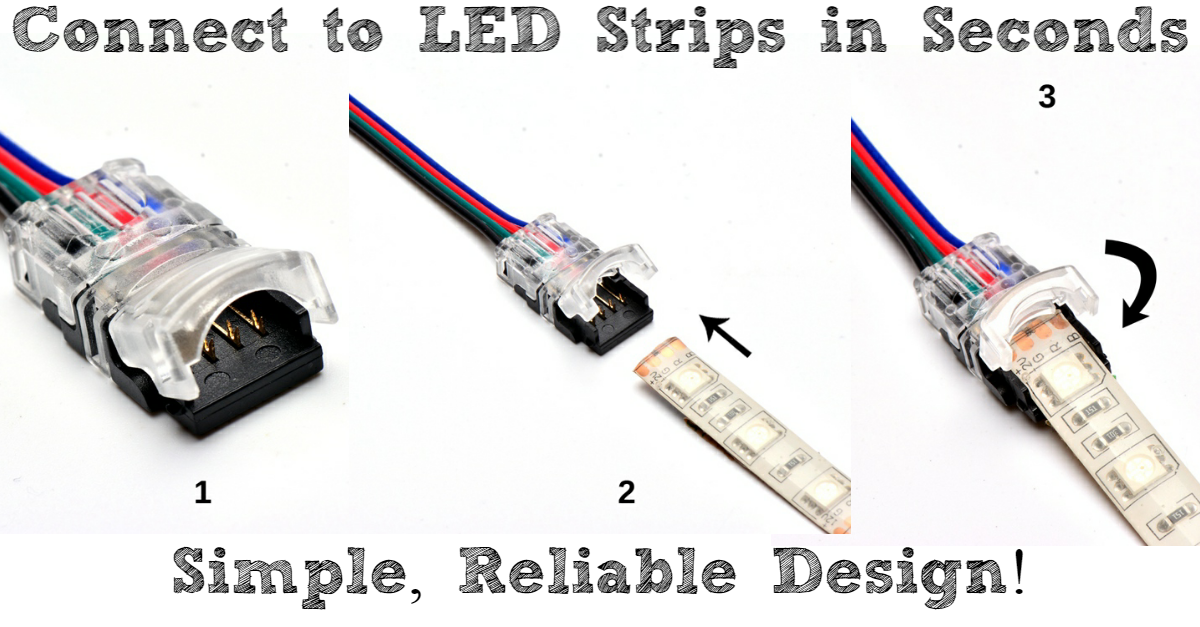
Repeat this process for any breaks in your LED Strips. MAKE SURE not to connect more than the max run length of your RGB strip. This is usually 10 meters for standard density and 5 meters for high density.
Step 5: Connecting Strips to Power
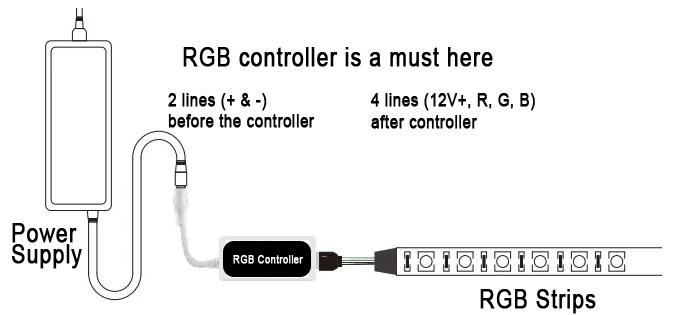
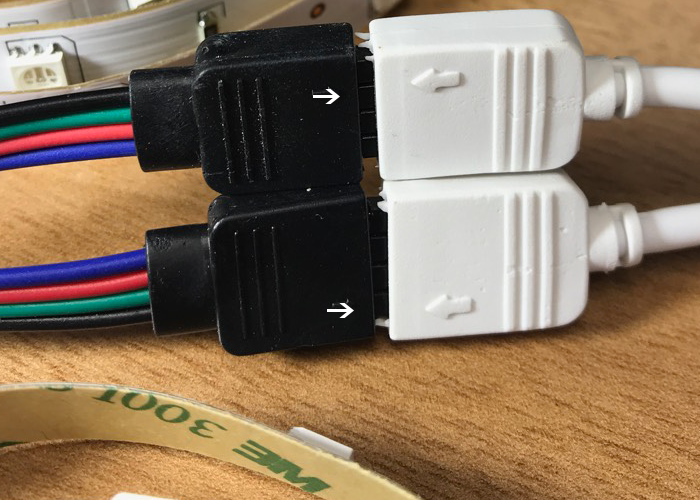
The strips will first connect to the LED Strip controller. Make sure to connect them so that the arrows on the RGB strip match up.
Next, connect your power supply to the controller. Most of our controller units take a 2.1mm male plug. If you are not using a plug-in power supply, you can still fix a 2.1mm plug on the end with this connector.
Lastly, make connections from your 110-120VAC to your power supply. If hard-wiring, PLEASE make sure power is turned off when making connections.
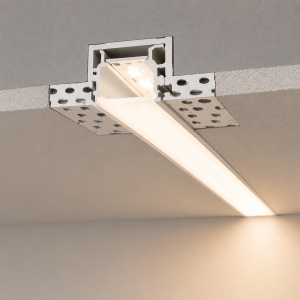
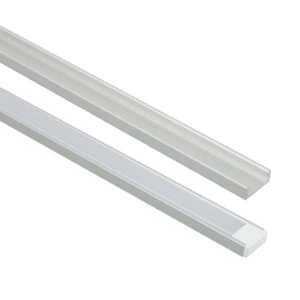
Step 6: Installation
After five long steps and a thousand plus words, we are ready to install the strip lights. You can now see that planning is the majority of the battle with RGB strip projects.
The first step is to clean any surface on which the LED strips themselves will go. This removes any grease and dust before we adhere the strips, making sure we get the best possible strip mount.
The strips come with adhesive backing, so it is straightforward from here but take your time. Rushing through this step can make your finished product look sloppy, so take time to ensure your strip is running straight and smooth on each surface you are sticking it to.
LED Strip Installation – PRO TIPS
- Make all connections between strip lights before installing. This ensures you don’t have to mess with the strips when they are already mounted, which could cause the adhesive to fail.
- After making connections, it is a good idea to quickly connect your strips to the controller and power supply for a quick initial test. This will save us time from having to fix a bad connection if we discover it after installation.
- Next, mount your strips to their desired areas, ensuring they are all connected, or each separate run has a 4-pin connection point.
- Connect the strips to your controller. You may need a jumper to connect to the controller between a certain distance or perhaps a splitter if you have two separate strips joining into one controller unit. MAKE SURE THE ARROWS line up on all these plug-in accessories.
- Lastly, connect your power supply to your controller unit.
Step 7: Final Test and Conclusion
After you have installed all components correctly, you can plug in your power supply (or switch the breaker if you are hardwiring) and test your product. It is a good idea to cycle through red, green, and blue to ensure all colors are operational.
If you go to one color and the strip goes out, you know which line has the issue. The 12V+ line might be the culprit if they all don’t work.
If you have followed this guide, all should light up fine and you now have RGB Strip lighting in your room, some of the best mood lighting around.
As explained throughout this post, you can modify these light strips as much as you want, the opportunities are endless. Make sure to comment below or email us with any questions about your RGB strip project. Checkout the finished work from some of our customers below!