


Light Emitting Diodes (LEDs) are all around us. They are in our homes, our cars, even our phones. LEDs come in a variety of shapes and sizes, this gives designers the ability to tailor them to their product. Any time something electronic lights up, there’s a good chance that an LED is behind it. Their low power and small sizes make them a great choice for many different products as they can be worked into the design more seamlessly to make it an overall better device.
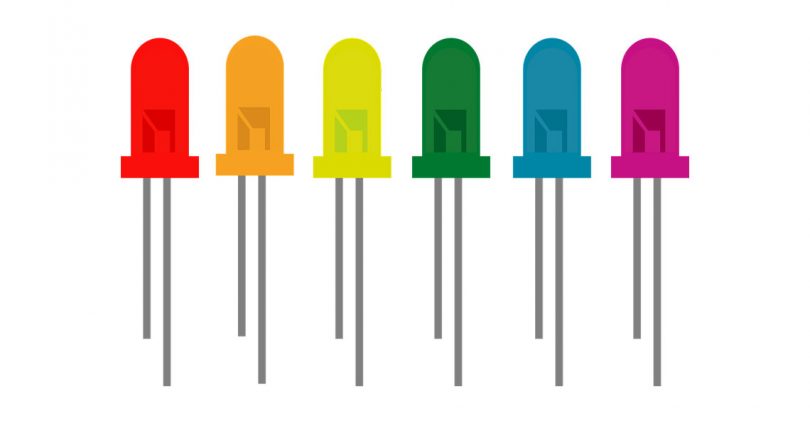
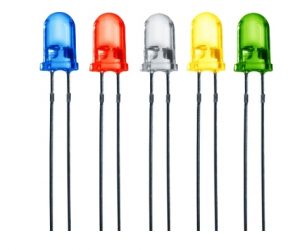 We have discussed high-brightness LEDs in the past, but throughout this post we will be focusing our attention on 5mm LEDs or through hole LEDs. These are the types of LEDs that are likely to be in your smaller electronics as an indicator light or something of that nature. 5mm LEDs take much less current to run than high brightness LEDs, 20mA compared to a minimum of 350mA for high-power LEDs. If you followed our original Mastering LEDs post, you should know: more current = more light. So obviously these 5mm LEDs are going to be more of an accent light or light for very small spaces. This is exactly the purpose of 5mm LEDs, they can be used together in a large array to create a sign or some sort of matrix, or they can be used on their own to make a small indicator light or one of those tiny key chain flashlights.
5mm LEDs are super helpful as they can easily be powered from a small battery source and last a long time. This makes it simple to incorporate them in many electronics or put lights where they normally could not go. The name 5mm LED is dubbed from their dimensions: the epoxy case on top is about 5mm in diameter. These super small light sources are simple to use, but we can’t overlook certain steps in setting up our LED circuit.
5mm LED Basics
An LED is a variant on the basic diode. A Diode is an electronic component that only conducts electricity in one direction. Diodes have what is called a forward voltage rating which determines the minimum voltage difference between the Anode (+) and Cathode (-) in order to allow electrons to flow (ahhh..sweet electricity). An LED is basically the same as a Diode, with the key difference being it generates light when the electricity flows.
5mm LEDs are a type of LED that hold the die on an anvil post that is encased in an epoxy dome for protection. Connections are then made via the two legs or prongs that come out of the bottom. As we mentioned, a diode only allows flow in one direction. This makes it crucial to differentiate between the positive side (the Anode) and the negative side (the Cathode). With 5mm LEDs it is easy, notice that the legs are different lengths? The longer leg is the Anode and the shorter of the two is the Cathode. If your legs are trimmed down or you have a manufacturer that makes them the same size, there is usually a flat spot around the rim of the 5mm case on the Cathode side (see below).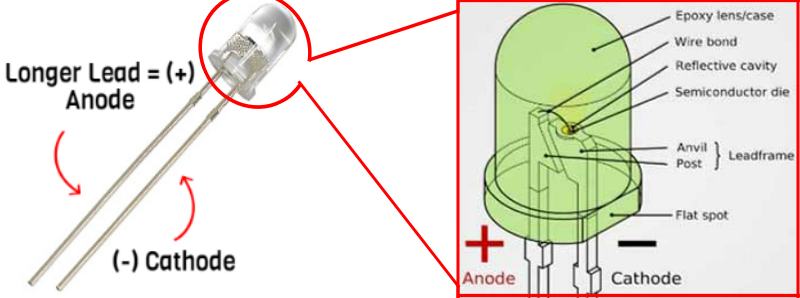
Make sure you always connect the positive of your battery/power source to the Anode and your negative or ground to the Cathode. This will make sure polarity matches up and electricity will flow given you have enough input voltage, lighting up your 5mm LED. If you wire it backwards nothing will happen and the circuit will remain closed. In making sure you have enough power for your light emitting diode, there are two key ratings you should pay attention to when looking at LEDs specifications: the forward voltage and the forward current.
5mm LED Voltage
Each LED should list a ‘Forward Voltage’ that defines the amount of voltage required in order to conduct electricity and produce light. If you try and supply anything less than this amount the LED will remain open and non-conductive. Once the voltage dropped across an LED reaches the forward voltage, your LED will light up. If you have multiple LEDs in series, you must account for the sum of their forward voltage ratings.
Let’s take a look at one of our standard Blue 5mm LEDs. Now we can easily see in the specifications on the product page that the LED has a forward voltage of about 3.4V. So we take this LED and try to hook it up to an AA battery, will the LED do anything? AA batteries only have a nominal voltage of 1.5V so no, we do not have enough voltage to conduct electricity. However, if we add another AA battery in series our voltage will be at 3V and we will be able to run the 5mm LED. ‘But you said that LED needed 3.4V!’ Yea I know, but when talking within a few decimal places like that you will be fine.
5mm LED Current
Now some people think they only need to take care of the LED voltage and they will be fine. This overlooks a very important part of LEDs, the current. LEDs will draw as much current as they can in a circuit, in turn causing the LED’s temperature to increase until it burns out. So in an effort to deal with less failed LEDs, let us please pay attention to LED current ratings.
The example above, when your input voltage and forward voltage are so close, is the one example where you will not need to worry about current much. As a rule of thumb on our site, when your input voltage is 3V, you can power any of the 5mm LEDs other than the reds and yellows without worrying about keeping track of the current. This is because there is not enough current available in the source power for the 5mm to draw and burn itself out.
In every other instance you need to limit the amount of current flowing through the LED. With
high-power LEDs this is done with a constant current driver. 5mm LEDs current ratings are much lower, usually around 15-30mA, and we can control the current by placing a resistor in series with the LED. This is where you will hear the term current limiting resistor a lot as the resistor makes sure the current that flows through the circuit is significantly limited.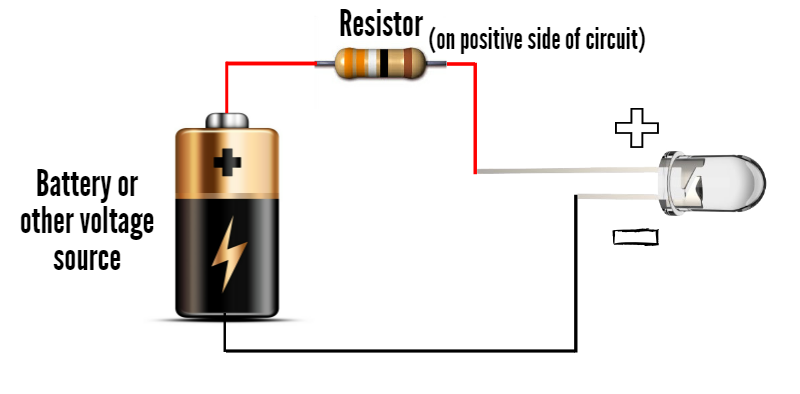
5mm LEDs are usually tested at 20mA, they can take up to 30mA of current but in my opinion I would usually try to keep 5mm LEDs at the 20mA that is recommended on all their specifications. Now we have to figure out how to find the right resistor size for your circuit in order to keep your LED(s) safe!
Finding the Right Size Resistor for your LEDs
Resistors come in a wide range of sizes and there is math involved in finding the correct size for your system. Don’t freak out though, we keep it super easy with this Resistance calculator that calculates the resistor size you need. This is a great tool, but it is always helpful finding out how calculations are made, so follow along. To find the correct size current limiting resistor, we must know two properties of the LED: forward current and forward voltage.
Let’s use the same blue LED from the example above. On the product page you will see the 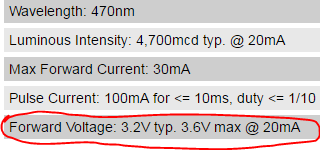 table pictured to the right. Circled you can see the forward voltage (Vf) at the given test current. So you can see for this LED, at a constant current of 20mA, the LED will drop 3.2-3.6V. We will take the middle ground and should assume this LED will drop 3.4V.
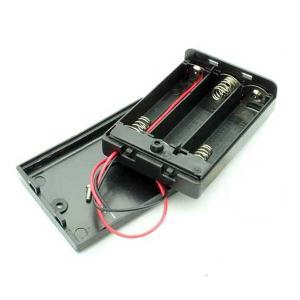
For this example, I will use 3 AA batteries in series as a power source. Each AA battery has a voltage of about 1.5V so in total we have 4.5V of power for our LED. We must use Ohm’s Law to find the resistor limit, but first we must find the voltage running across it. The resistor and LED will be placed in series, meaning the voltage dropped across them will be summed up to equal the input voltage. This means we can easily find the voltage that will be dropped across the resistor as we already know the LEDs is 3.4V.
Input Voltage = LED Vf + Resistor Voltage
Resistor Voltage = Input Voltage – LED Vf
Voltage Across Resistor = 4.5V – 3.4V
So about 1.1V will be dropped across the resistor. Now that we have this, we can use Ohm’s Law to calculate the needed resistance!
Resistance = Voltage / Current (in Amps)
Resistance = 1.1 / .02 (20mA)
Resistance = 55 Ohms
Depending on the LED, the resistor will change. For this example we can assume a 55 Ohm resistor is needed, the closest size we have is 60.4, so we would select that. When in doubt about the value or if you have one in between the resistance values offered, select the slightly larger size.
One last thing to check with your LEDs and resistors is the resistor wattage. All of our resistors are a ¼ watt. The required wattage of the resistor is the difference between the wattage of the LED and the total wattage of the circuit. So with the above example we will find the resistor wattage required.
LED Wattage = 3.4V x .02A = .068 Watts
Total Wattage = 4.5V x .02A = .09 Watts
Wattage dissipated by resistor = .09 – .068 = .022 Watts
A ¼ watt (0.25) resistor can easily handle .022 Watts so we are all set! Set up the resistor in series with the LED (on the positive side of the connection) and your light is all set.
The Ultimate Resistor
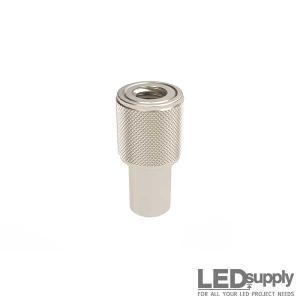
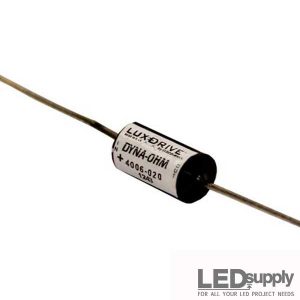 Don’t want to go through the hassle of finding a resistor and dealing with multiple resistors in one circuit? Check out LuxDrive’s DynaOhm. This is a fully potted semi-conductor based variable resistor that is optimized to replace resistors in 5mm LED applications. This unit will go in series, just as a resistor does. The difference is it is already rated for a certain current rating so all you need to worry about is voltage. The DynaOhm can take 2.6V to 50VDC, so input whatever you need for your LEDs.
5mm LED Light Output
Now that we have gone over all that fun talk about voltage and current we can dive into what people really care about, the light that these tiny light bulbs give off. Color and brightness are measured in a few different ways. Our site always lists and organizes them well but let’s learn how these diodes create the light they do.
LED Wavelength
LED wavelength is basically a very precise way of explaining the color of the light. For LEDs, there will be a variation in color as the manufacturing process is intense and sometimes there are slightly different wavelengths. On a 5mm LED specification sheet you will actually see a minimum and maximum wavelength. The variations are always within the same spectrum, just if you buy LEDs of the same color in many different batches, there is likely to be some slight variations (even if our eyes don’t notice them).
This wavelength is actually determined by the type of semiconductor material used to make the diode inside this 5mm package. The energy band structure of semiconductors varies between materials, so photons are emitted with differing frequencies which effects the light we see. Below is a full table of our LEDs and wavelength options. Some of the more popular colors we sell are Deep Red 660nm, and Pink 440nm.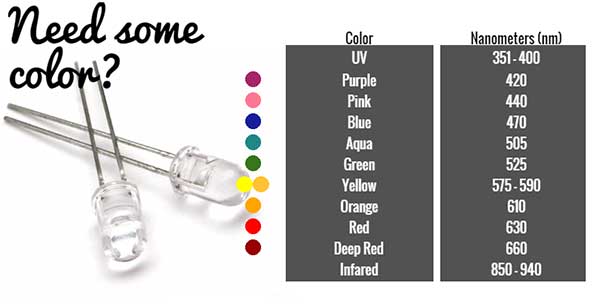
There are also 5mm White LEDs available in warm and cool white.
LED Brightness
So the wavelength depends on the semiconductor material but the light intensity depends on the current being pushed to the diode. Therefore, the higher the drive current, the brighter your LED will be. 5mm LEDs brightness is usually measured in millicandelas (mcd), but there is much more to this than just putting a certain number of brightness on any LED.
The interesting thing about this measurement of light, the candela, is that it isn’t the measure of the amount of light energy, like most other light forms are measured, but rather the actual brightness. This number is found by taking the power emitted in a particular direction and weighting that number by the luminosity function of the light. This basically means that beam angle, which we will discuss below, can affect the light but so does the wavelengths. The human eye is more sensitive to some wavelengths than others, and this brightness model takes that into account. This is why IR 5mm LEDs will have no output because we cannot see that wavelength. This is the same for UV and even blues and other common colors.
This luminous intensity (brightness) varies from LED to LED as you will see. The colors tend to be lower, from tens to hundreds, whereas the whites (and some colors we see better, like green) can get up to 20,000 mcd. We list all 5mm LEDs light output at their test current, 20mA.
5mm Viewing Angle
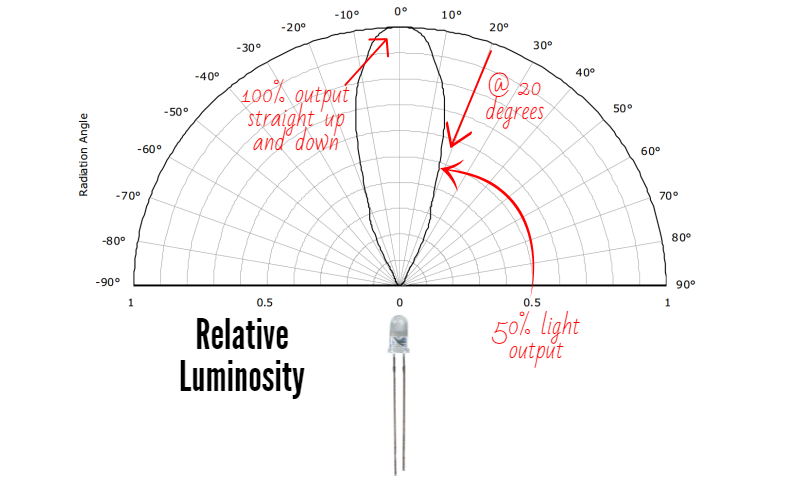
5mm LEDs on our site will be labeled by their color and beam angle. 5mm LEDs show a graph 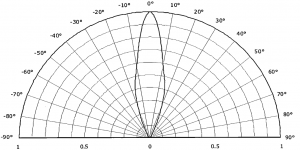 like the one to the right that shows the angle the beam will go and the intensity at certain angles. To read the graph, imagine the LED is standing upright underneath it. The ‘spokes’ on the graph are the angles, and the rainbow like lines are the intensity by percentage of maximum intensity. Take a look below as we describe how to find the viewing angle and brightness at that angle of any 5mm LED.
Diffused 5mm LED
It is often recommended to have some sort of diffuser or frosted finish if LEDs will be looked at directly by the human eye. Some 5mm LEDs come with a finish on the epoxy dome that will make the light output much more soft. We have one white 5mm LED that utilizes this finish so it is easy on the eye. This will bring the brightness down but makes for a better looking light.
Go Explore with 5mm LEDs
5mm LEDs are super affordable and easy to work out. See what you can do with them, the options are endless. Now you know how to power your 5mm LEDs, determine their color and brightness, and making sure the light will spread to where you need it. Good luck!