


DIY LED Reef Tank Light
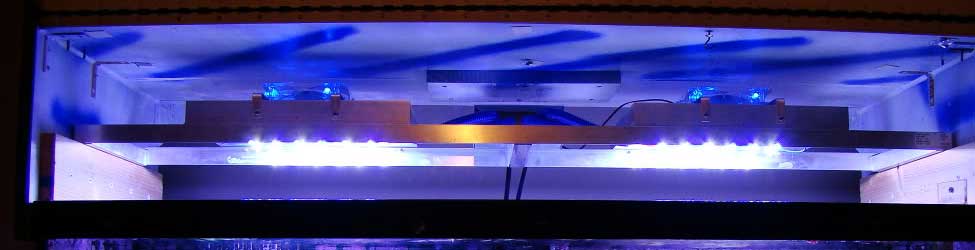
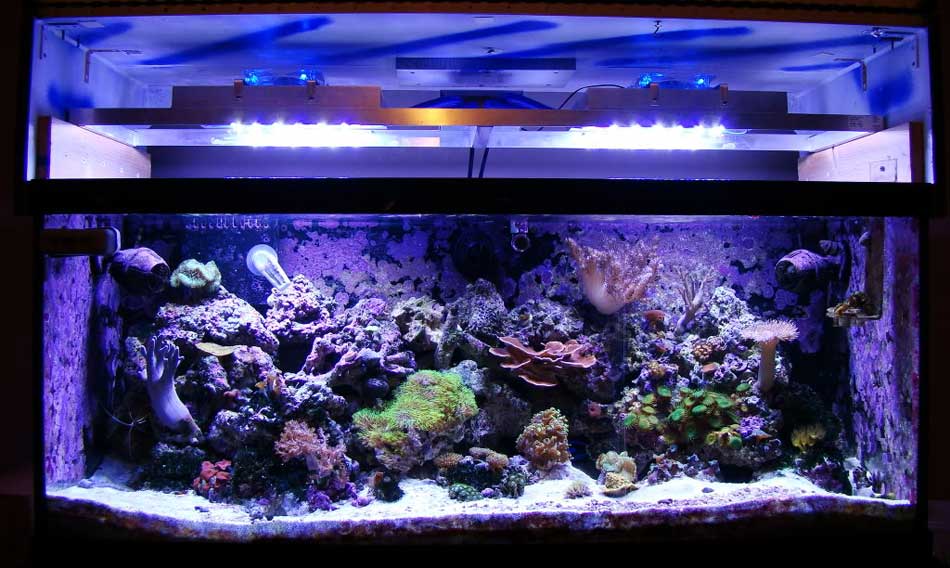
75 Gallon DIY Reef Tank Light
Skill Level:
INTERMEDIATE
Estimated Time:
1 Weekend
Cost:
Under $600
Tools
Drill
Screwdriver
Wire Strippers
Solder Iron & Solder
Wire
Materials
24pcs:
Royal-Blue Cree LED - #CREEXTE-ROY-124pcs:
Cool-White Cree LED - #CREEXTE-W1308pcs:
1000mA BuckBlock - #A009-D-V-10004-Feet:
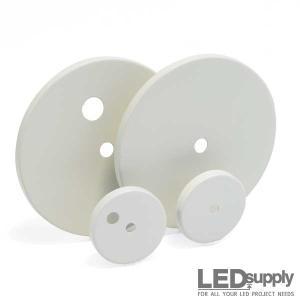
MakersLED Heatsink Kit - #MAKERSLED4pcs:
24VDC Power Supplies - #24VDC45A4pcs:
Thermal Compound - #AS5-35GVarying:
24 Gauge Stranded Wire - #24AWGThis project was one of the first to makes waves for LEDs as a viable option for Reef Tanks. It started in early 2009 and therefore used, by today's standards, OLD LEDs. LEDSupply assisted in the project back then, but is now suggesting upgrading the LEDs, considering the MakersLED Heatsink and using the dimmable 1000mA BuckBlock for both the White and Blue LEDs.
DISCLAIMER: This project involves both low voltage DC current and high voltage AC current. Risk of electric shock should be obvious and if you are not comfortable with basic electronics wiring, leave this to someone more experienced. As with any project like this, mileage will vary.
I claim that this saves money. Why is that? To begin with, LEDs last for 50,000 hours. After that, they drop about 30% in brightness. How many times would you need to replace halide or PC bulbs in 50,000 hours of burn time? Also, power consumption is far less than even PC lighting for the output.
Step 1
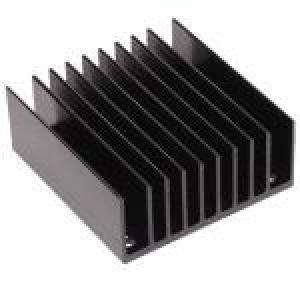
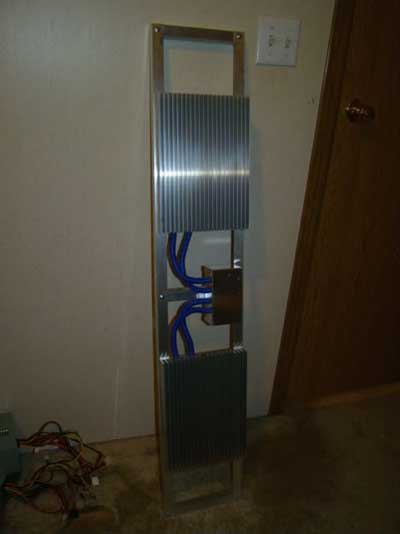
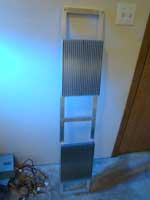 Getting Started: I have a 75 gallon tank, therefore, I needed a light fixture of 48" in length. I found some 1" angle aluminum in 4' sections at my local hardware store. I picked up two of them along with 3' of 1" square aluminum tube. The heatsinks that I used were 12"x8.5". I cut the square tubing to 8.5 lengths and screwed them to each end of the aluminum angle and to the middle for further support. The heatsinks were easily attached by drilling through and tapping them to allow for the stainless machine screws to securely attach the heatsink to the aluminum frame.
Step 2
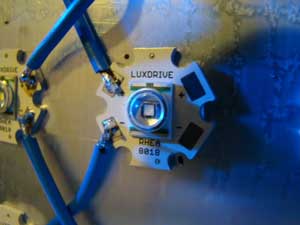

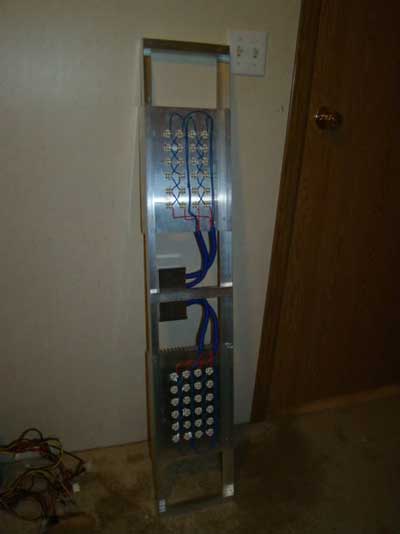
Mounting the LEDS: I studied the array of the Solaris fixtures and saw that the LEDs were in an alternating blue/white pattern. This seemed like a winning combination so I did just that. Each buckpuck can safely handle 6 LEDs. This is where I got my array of 24 LEDs in each array VS the 25 in each Solaris array. (6x4=24) I arranged the LEDs in a crisscross pattern as shown.
To attach the LEDs to the heatsink, use the Arctic Alumina heatsink epoxy. As the packaging states, the bond is PERMANENT so make sure you have the LEDs aligned before attaching them. It’s best to save the wiring job until the LEDs are mounted and the epoxy has cured.
The LEDs need to be arranged so that they can be wired in series. For example, the first LED, closest to the buckpuck driver, needs to have the negative lead facing the buckpuck direction. The positive of that LED needs to be connected to the negative of the next LED and so on until the string of 6 is complete. The positive of the last LED in the string runs back to the buckpuck. NOTE* - I used 700mA drivers on the BLUE and 1000mA drivers on the WHITE.
Step 3
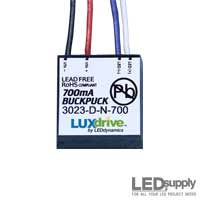
LED Drivers: As I said, I used 8 buckpuck drivers that can be had at www.ledsupply.com. I used the non-dimmable versions because I didn't care about that feature. The dimmable versions are slightly more expensive but can open up a few features. For example, you can dim each string to fit your needs. This could be helpful in the acclimation process.
This is a fairly simple setup. All of the negative leads from the buckpucks driving the BLUES will be connected and all of the positive leads will be connected. The same goes for the WHITE drivers. Each LED output from the individual buckpucks goes to an individual string of LEDs.
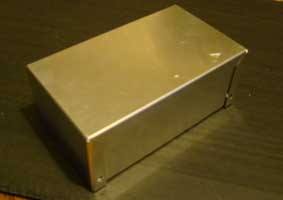
You will need a place to hide the buckpucks. An aluminum project box from Radio Shack worked perfectly for this, keeping with the all aluminum theme. The buckpucks produce no heat and can be thrown in the box indiscriminately if you wish. However, to keep the wiring (which there is a lot of) in order, the buckpucks can be epoxied to the inner walls of the project box. It would be smart to keep the 700mA on one side and the 1000mA on the other.
Drill some access holes in the box as you will need to route wiring through them. I made 4 holes in the front, all 3/8†to both run wires through and allow for the wire loom to fit securely inside the hole. On the back, drill whatever size hole you need to run the power and fans. This is where you get to be as creative as you want. I drilled holes, inserted rubber grommets and ran the wires. You can use whatever you want as the control center and make it look like whatever you wish.
Step 5
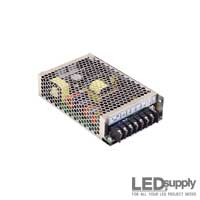
Power: For power, you will need to acquire a 24V power source that can handle the load of the LEDs. I found the perfect power supply at www.mpja.com. It is a 24V 6.5A CNC power supply. You will need one for each type of LED. The BLUES get one and the WHITES get one.
NOTE* - You can use any type of 24V DV power supply you want. Just make sure that the amperage draw from the LEDs does not exceed the amperage available from the power supply. For example, running 4 strings of 6 LEDs being driven at 1000mA is a total draw of 4 amps. Using a 24V 3A power supply, will, in my experience, kill the power supply. The buckpucks can handle up to 32V but only 24 is needed for a string of 6, which is the recommended maximum number of LEDs per string.
The wiring of the power supply is rather simple as well. You will need an AC cord with a ground. If you can find a few old computer power cords, just cut the end off and wire that to the power supply.
NOTE* - ALWAYS TEST your connections before just plugging the cord into the wall!
The output of the power supply is in a simple positive/negative DC fashion. These will run to the respective positive and negative leads on the buckpucks.
Step 6
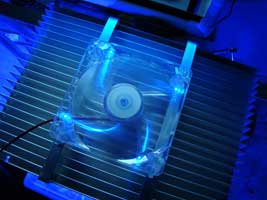 Cooling: High power LEDs generate heat. It's not a ton of heat, but the cooler they run, the longer they last. I found some 120mm fans on ebay and purchased 4 of them. Check the fan noise rating which is listed as DB. The ones I purchased were listed at 20DB. This is barely audible in a silent room. I found that when they arrived, they were larger than I thought. I only used one on each heatsink and the cooling effect is substantial. Without the fans, the heatsinks would reach a feverish forehead feeling. With them, they are cool to the touch after hours of run time.
To mount the fans, I used some flat 1/2" wide lengths of aluminum. They were bent to the shape of the heatsink and mounted with the same drilling and tapping method. NOTE* - Be sure to raise the fan off the heatsink by at least 1/4" to allow for air flow.
So, now you're looking at this and thinking that the fans are 12V and the power supplies are 24V. How does this work? I had the same problem and the fix is simple. Wire them in series. The positive from one fan goes to the positive of the 24V power to the buckpucks. The negative of that fan goes to the positive of the other. That last negative goes back to the negative of the same buckpuck circuit.
The power supplies get warm, as well. I don't know if they absolutely need cooling, but I happened to have two extra fans. I added them to the box that I mounted the power supplies in.
Final
Optics: I am fully aware that optics will increase the output of LEDs. However, I decided not to use them because they cut down on the spread of the light. In order to use the optics, successfully, you will need to keep the LED arrays closer together and, most likely, need more LEDs to get the desired spread.
That's really about it. You can build this exact fixture for about $600 and never have to replace any bulbs. After 11 years or so, the LEDs will lose some of their intensity. But, that's 11 years down the road. Consider the cost of replacing bulbs in standard MH or PC fixtures over the span of 11 years. This type of lighting pays for itself over time. Your electric bill will thank you, as well.
As always, your mileage will vary. You can make whatever you want and have it look like whatever you want. The important things here are the wiring and cooling. Other than that, the canvas is yours to paint.
I hope this will help those of you interested in LED lighting but don't want to spend the incredible prices out there for pre-manufactured LED fixtures.


- Low Prices
- Knowledgeable Support
- 100K+ Orders Shipped
- Free Shipping
- Bulk Discounts
- 2,000+ 5-Star Reviews
LEDSupply is a trusted provider of engineered LED lighting solutions, serving OEMs, integrators, contractors, and lighting professionals with technical expertise, application support, and carefully curated high-performance products. Backed by decades of industry experience, our team helps customers move from components to complete lighting solutions with confidence. Learn More


Shipping
LEDSupply does NOT profit from the shipping or handling of your order!
Orders received before 3PM EST will be safely packaged and quickly shipped the same business day. If your order is NOT shipped the same business day, LEDSupply will offer a 5% discount off your next order.
All orders SHIP FROM:
296 Beanville Road
Randolph, Vermont 05060
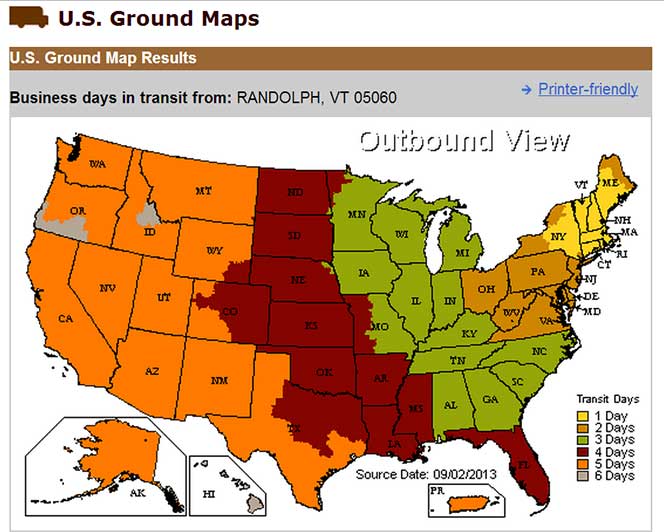
See respective ZONE maps below for SPECIFIC delivery time to your location:
Any order that does not qualify for free shipping, will by default include a discount of equal value to the free shipping offer.
The shipping offered is meant to provide the widest variety of shipping options at the lowest price:
- FREE USPS First Class SHIPPING on orders under 13oz & >$49.99
- $5.99 USPS First Class on orders under 13oz & <$49.99
- $15.99 2-Day SHIPPING on orders under 2lbs
- $11.99 GROUND SHIPPING on orders under 2lbs
- $39.99 Standard Overnight SHIPPING on orders under 2lbs
- $49.99 Priority Overnight SHIPPING on orders under 2lbs
- Real-Time Rates are calculated for all International shipments
- *Base Rate + $1.99/lb for orders over 2lbs
USPS Priority Delivery Zone Map: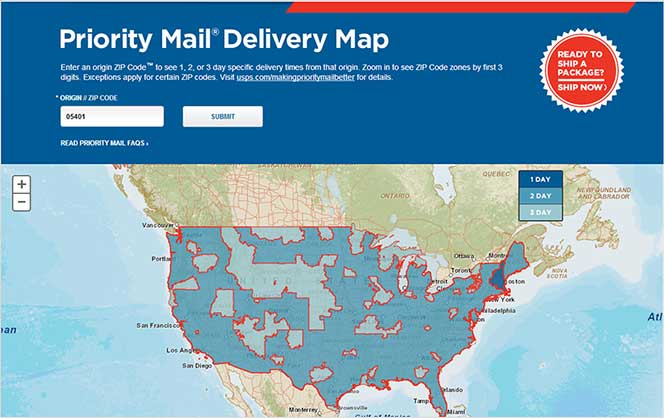
FedEX Ground Delivery Zone Map: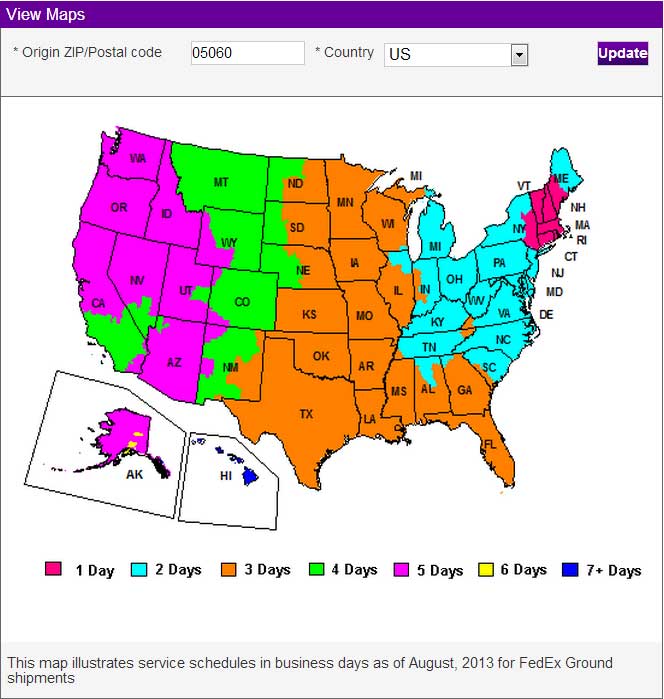
UPS Ground Delivery Zone Map: