


To avoid damage and a lot of frustration, anyone planning to install LED strip lights should first know the best way to make connections to the strips. If poor connections are made, lights will flicker, go off unexpectedly or worse, not work at all. Unfortunately, many mistakes are made within this step but the good news is that connection issues are simple to fix or avoid with the right strip connectors.
The LED strip connectors in this guide will help you to:
- Connect two strips together, end-to-end to make a longer length
- Run a gap in between your strip lights
- Connect power leads to an LED strip
- Make small connections around corners
LED strip connectors provide a quick-connect solution that lets people avoid having to use a soldering iron. If you do have a soldering iron, or want to buy one, then we recommend soldering as the most reliable option. In fact, here is a quick guide on soldering your LED connections.
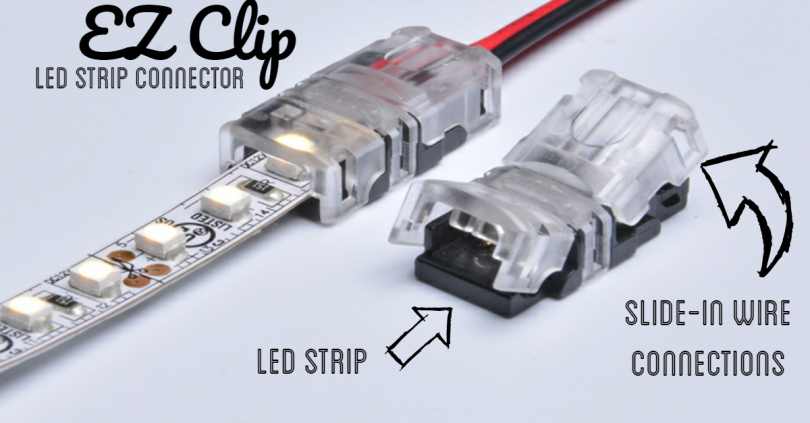
While soldering is very reliable, it can take a lot of time if you have many different connections to make. That is why LED strip light solderless connectors work wonders to make numerous connections with ease. In this tutorial, we will go over how to use the strip connectors properly, to their full potential.
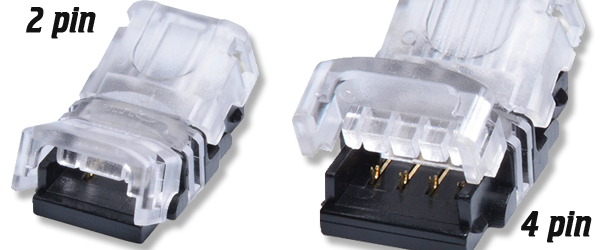
2 Pin and 4 Pin LED Strip Connectors
There are two different connection types for the EZ Click tight connectors for LED strip lights. The 2-pin LED strip connectors are used for single color strips. They only require a two-port connection as they simply need one positive and one negative connection.
The 4 pin connectors are identical in size and shape to the 2-pin but include 4 pins that match up with the connection points on RGB (color changing) strip lights. The 4 pin RGB connectors have one common positive line as well as a connection for each of the Red, Green and Blue color LEDs so that they can all be controlled separately to make an assortment of different colors.
There are both 2 and 4 pin versions of the following LED strip connectors:
- Strip-to-Strip: Easily connect strips end to end to form a longer run.
- Strip-to-Wire: Connect to your strip and run wires out the other end to run to your power source or to another strip light if you have a gap in your LED run. The strip-to-wire connectors are sold with 6 inch wire leads.
For both waterproof and non-waterproof strips!
The only other option for the connectors is choosing IP67 if you have a waterproof strip or choosing the IP20 option if you have an IP20 strip. The IP67 connectors sit taller as they account for the silicone covering which is the only difference between the two. They will not fit if you purchase the wrong connector, however, so please make sure you have the connector matched up to the right strip.
Connecting to LED Strips
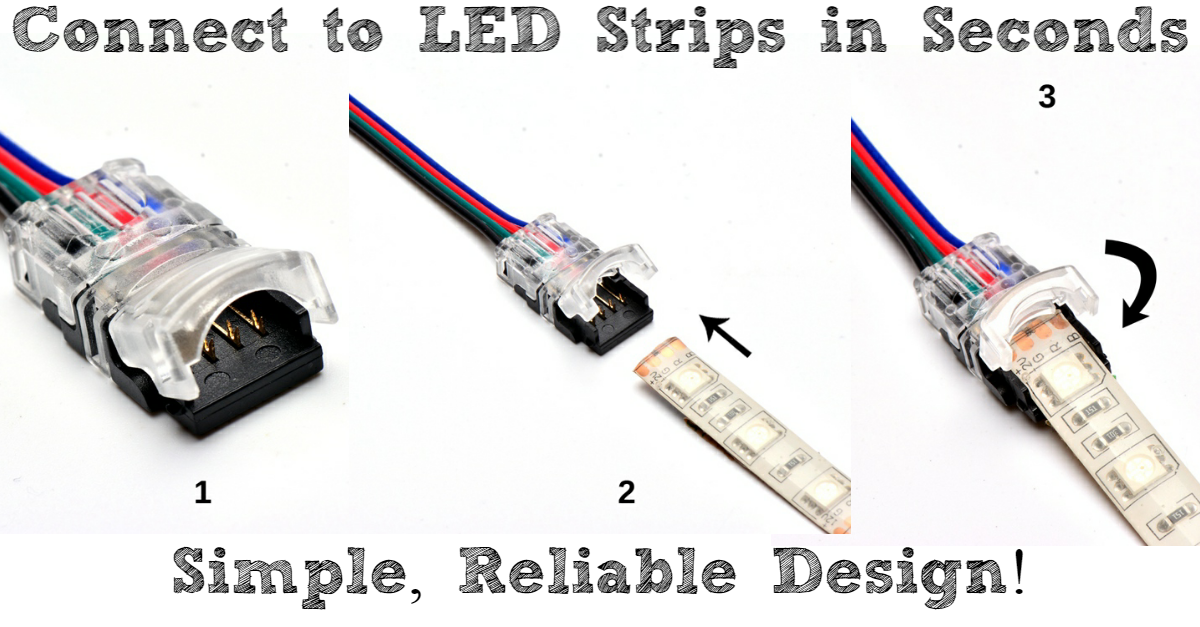
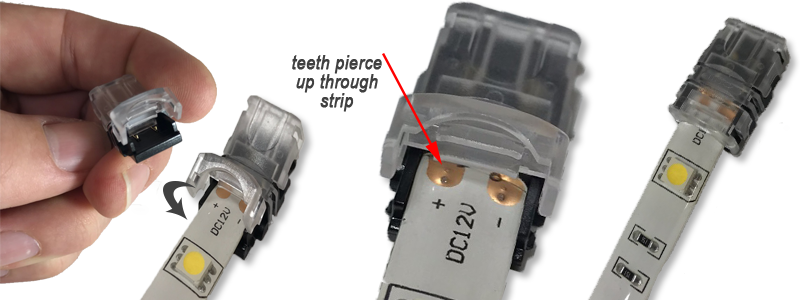
The connectors are easy to connect onto a strip end that has been cut. The connector will have 2-4 sharp teeth sticking straight up, the strip will slide in above these teeth:
- Make sure to lift the clear plastic cover and slide the strip in until it hits the backstop, it should sit under the lowest clear tab as shown in the picture.
- Once it is in as far as it will go, push the tab down making sure each side clicks into place.
- Once you click it down the teeth should pierce up through the bottom of the copper pads on the strip, making for a solid connection. I lifted the tab here to show you how the teeth pierce the copper connection points.
This should make for a solid connection that will last. Extreme pulling on the strip would obviously pull it out but other than that, this is a quality connection to your strip! *As a side note you do not need to remove the silicone from the Waterproof strips, some connectors require this but the EZ clicks do not!
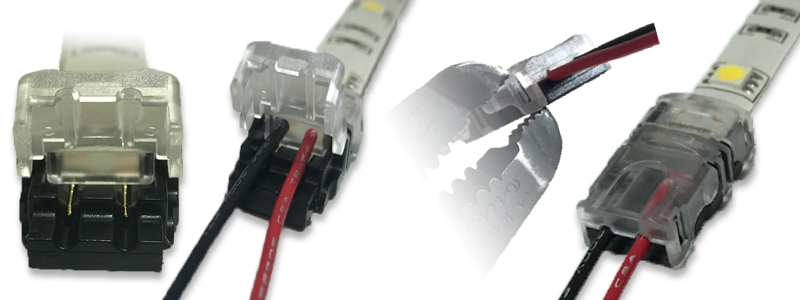
Connecting Strip Connector to Wire
These solderless connectors work best with 20 AWG stranded wire. There is no need to strip the wires before connecting.
- Make sure to lift the clear cover and slide the wires in as far as they can. Make sure you color code your wires or make sure they all line up. We use red for positive and black for negative. RGB connectors will have 4 wires as stated earlier.
- Once the wires are sitting above the grooves click the cap down. For the wire side it is best to use a set of pliers to help click the connector down all the way, it takes some force!
- If you’re having trouble with wires moving around, try first pushing the wires into the slots a little more so they do not move when you try to clip the cap down.
- You now have a solid connection to wires and can run them to your power source or to another section of strip!
Here is a brief video that uses the two processes above to connect an LED strip to power without soldering!
LED Strip-to-Strip Connection
Have two shorter strips that you want to chain together to make a longer strip? As long as you are staying within the maximum run limitations (32.8 ft. for High Density and 16.4 ft. for Standard Density) you can do that easily with one strip to strip connector!

Run a larger gap in your application
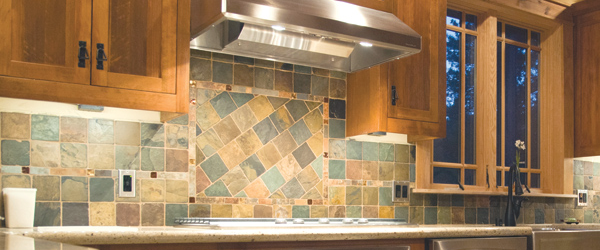
Say we are doing an undercabinet kitchen project and you want to span a gap where your stove or sink is. To do this all you would need are two strip-to-wire connectors and enough 20-gauge stranded wire to run your gap. You will put a connector on the end of each strip you are connecting and then connect the wires into the grooves as we show above.
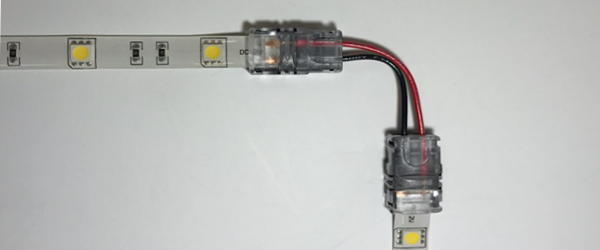
LED Strip Corner Connectors
This can be done exactly like above but is usually in very small sections as the purpose is to turn a sharp corner at an angle the flex strips could not bend themselves. All you need is two strip-to-wire connectors and enough wire to turn your corner.
EZ ClickTight Connector Tips and Troubleshooting
- If you experience any flicker from the strip or it fails to light up then there is likely a connection issue. Make sure that the teeth are piercing up through the strips and that your wire is pressed into the grooves.
- Another common issue is mixing up wires. Polarity matters so make sure all your wires are going to the like traces on the strip! (positive to positive, negative to negative)
- Make sure you are using compatible strips, these work with our 12V LED flex strips. They will work with other 10mm LED flex strips as well and need 20-guage stranded wire to work. If you are using these parts, you should be fine.
- If you need to seal your connections because you are in a wet area then I would recommend putting some heat shrink over the whole connector. We use ½ inch heat shrink to do so here that works.
With this you should be ready to tackle any combination of strip-to-strip or strip-to wire connections. If you need a quick refresher on LED strip lights and how to wire and power them take a look here…if not feel free to check out the connectors by clicking the image below!