


 Lets see if you have what it takes to grow plants indoors!
Indoor growing is an art, but like most things, when fundamental guidelines are followed, usually good results aren’t too far behind. Lets use cooking as an example, once a chef creates a delicious meal, that meal can be recreated by following a recipe, right? Anyone can follow a recipe, so anyone is capable of growing well if provided a solid foundation to start from. And, with experience, creating fantastic results is where the art comes in; but lets start simple, with an indoor growing guide recipe that you can easily follow!
The foundation for a successful grow starts with these 5 areas:
1) Light
2) Air
3) Grow Medium
4) Nutrients
5) Water
Lets start with the light source
Replacing the sun with an artificial source is the most important factor, without a good grow light all the other steps are meaningless.
Sure, the old way of growing indoors with an HID light works. The HID bulb has produced many great results, but, when considering “small scale” grow operations, the HID comes away with more cons then pros. It makes the process more complicated, expensive and dangerous. The articles are endless on the comparison between LEDs and HID lights and many bad LED products have helped to keep the myth alive that LEDs don’t work. Well, LEDs do work and they work very well. Here is a link to a grasscity.com forum thread where a good LED product was used. And here is another one of the first sites to show their grow journals using LEDs.
The major negative to LEDs is the upfront cost. But, cost have come down and they it really isn’t that bad for example here is a 300W LED grow kit for under $800, which would compare to a 600W MH or HID. Anyway, when you factor in the lifetime of a quality LED product, plus the average yield from your first grow; the product pays for itself after 3-months of use.
What is the upside to using LEDs?
The electricity saved with LEDs is nice, the lifetime of the product is great, but one of the most important benefits is the low heat output. A huge hurdle to successful grow operations is controlling the air temperature within the grow room. Controlling the temperature is very easy with LEDs, where with HIDs, it is not. HID lamps are costly to run, have a short lifetime, are extremely inefficient which is why all the extra heat is created. The heat from an HID can easily start a fire, burn your plants and heat up the grow room so much that you need to spend more money on active AC cooling.
Here is a list of why you should use a quality LED grow light:
1) lower energy consumption
2) long lifetime
3) physically more robust, resistant to shock
4) lower heat output
5) easier to focus the light
6) instant on/off
7) dimming available if necessary
8) safer product “class 1” no mercury
What would be a good LED light to use?
LIGHT:
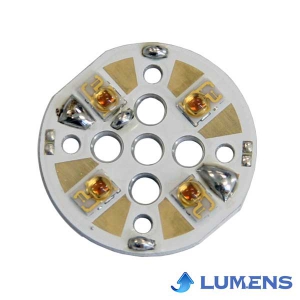
In general, never use a knock-off or cheap LED product and be skeptical of any product that doesn’t divulge which brand of LED is being used – Always use name brand LEDs with a constant current source with proven reliability. One of the reasons for using LEDs is longevity, but not all LEDs are created equal and there are LED products with poor reliability and lifetime issues. So, don’t go half way and buy a cheap LED product that is likely to break – buy a name brand LED product that will last.
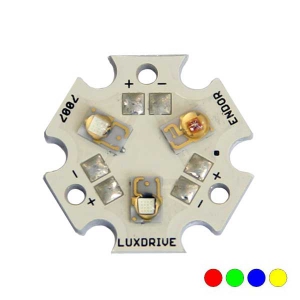
The two spectrum’s required are 450nm-470nm (Royal-Blue to Blue) and 630nm-660nm (Red to Deep-Red). For the best results we recommend as many different spectrum’s as possible, but it is not required. Remember we are trying to replicate the spectrum from the sun, however the main two spectrums from the sun that the plant abosrbs are the Royal-Blue and Red spectrum.
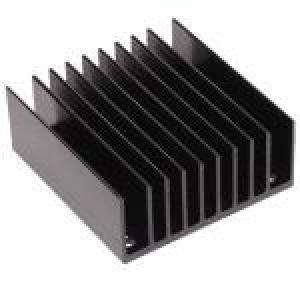
To preserve the LEDs and to guarantee they emit the most amount of light, a good heatsink is absolutely necessary. LEDs do create a manageable amount of heat, but if overlooked, excessive heat will burn holes in the LED and cause the lumen output to drop below adequate levels. LEDs have made extraordinary improvements over the past few years. Forward voltages have gone down, maximum drive currents have gone up, lumen output has gone up, and maximum running temperatures have gone up, but still optimizing the environment with heatsinks is mandatory.
Your lighting schedule should be 18-hours on and 6-hours off during veg and 12-hours on and 12-hours off during flower. IT IS VERY IMPORTANT that during “off” times there is ABSOLUTELY no light leaks. Also, keep in mind depending on your plant genetics that the length of your plant will likely double or more in height after you switch to flowering.
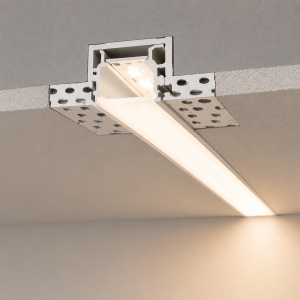
Situate the LED light source as close as possible to the plants while still spreading the light over the entire growing area. As a benchmark, often this distance ends up being around 6 to 12inches.
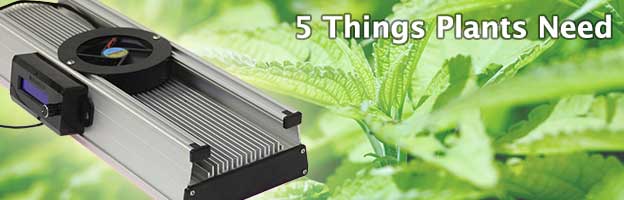
Here is an example of a LED Grow Light with excellent characteristics for growing. It uses the popular Cree XP-E2 style LEDs, reliable constant current drivers and the heatsink is perfect for removing unwanted heat. It is also a solderless and scalable kit, meaning it can be built in 6inch increments, up to a total length of 4-feet. The kit comes with a full spectrum of LEDs, drivers, fans, power-supplies and wiring schematic; basically, everything necessary for a turn-key grow light, but without the extra cost associated with “finished” grow light products.
AIR:
Ok, so what’s next…We have the right light, now it’s time to talk about AIR and your grow room environment. It’s not easy to simulate the perfect outdoor environment, but the closer you get the better the results. The easiest thing to do and if not done, the quickest way to ruin your work, is not keeping it clean. A clean environment will help assure that bugs don’t end up consuming your plants before you get to. Wipe everything thing down and keep it clean through-out the grow.
It’s important that there be air circulation, meaning, clean air coming in and used air going out. In general, whatever intake and exhaust system you use, the air should be able to be completely replaced every two minutes. Usually fans are measured in cubic feet per minute (CFM). So you need to do the math on the cubic feet within your grow room and make sure that your exhaust fan specifications can move that kinda air.
The air temperature needs to stay between 70-85 degree Fahrenheit. The air humidity needs to stay between 40-60%; on the lower side during the flowering stage and on the higher side during the vegetative stage is best. Buy yourself a digital thermometer with both a temperature and humidity reading. If humidity gets high during the flowering season the chance for mold growth increases.
Many people use “grow tents” or a small closest. If you aren’t the most handy person, then the recommendation would be to spend a few hundred dollars and buy a grow tent designed specifically for the application. Usually the grow tents are easy to set-up and have all the intake and outtake locations built in.
If you can’t exhaust the air outdoors or even if you can and want to eliminate the smell before exhausting, then you need to buy or custom build a carbon scrubber. There are many DIY projects highlighting how to use screens, panty hose and carbon pellets to clean the smell from the exhausted air. If done well you can clean the smell so well that people in the same room wouldn’t notice. As an additional precaution, use high strength air fresheners like ozium.
GROW MEDIUM:
The least complicated and believed by many to produce the best tasting plant is one grown from soil. Other mediums like hydroponics work very well and often once mastered is an easier method to feed the plant, but it also requires additional set-up and tools, where a soil grow is pretty straight forward and very forgiving if a mistake is made.
All you need is soil and a plant pot — Do not buy a cheap soil. Something like Fox Farm Ocean Forest (FFOF) soil works very well mixed with 25% perlite and 2 tablespoons of “dolomite” lime per gallon of soil. The soil shouldn’t be too loosely packed or too tightly packed. The FFOF soil has enough nutrients within the mix to last approximately 1-month. Normally this will be enough to last through the vegetative growth stage. After this point, the flowering stage requires additional nutrients to help increase yield.
It is recommended that the ratio of grow medium be: 1-gallon pot for every foot of plant. Having the proper amount of soil will allow the root structure enough space as well as help balance the PH of the soil.
NUTRIENTS:
Fox Farm Ocean Forest is a nutrient rich soil (hot) so a grow can be successful without any additional nutrients. For optimum results use 1/4 strength of whatever the suggested feeding schedule is. However don’t start the feeding schedule until 30-days into the grow. A very fast way to ruin your grow is by using too much nutrient. Too much nutrient can cause a salt build up and cause the plant to “lock-out” important nutrients. It is highly recommended to tread lightly around nutrients, they can quickly be the reason a grow is ruined. The three pack of Fox Farm nutrients works well: Grow Big, Big Bloom, and Tiger Bloom.
WATER:
Lots of people suggest a reverse osmosis (RO) technique for purifying water, but, using tap water can also work great and if RO water isn’t in your budget then feel free to use regular water, but…Let the water sit for 24 hours at room temperature and for even better results aerate with a air-stone…this will blow off the chlorine from your tap water.
Here is the most important thing of all…DON’T OVER WATER…Let your plants completely dry-out before watering again. Wait until the soil is cracked and pulling away from the rim of the pot. The pots should feel really light; not heavy when lifting. Don’t let the plant droop and die but you want those roots to be searching for water; growing in search of water, hopefully filling the pot with roots. A good root system is paramount to big harvests and you want lots of leaves and bushy plants – grow big thick healthy roots so when you flower they can take in all the food when the plants metabolism speeds up.
SECONDARY CONSIDERATIONS:
1) Planning: Do you want to have a perpetual grow set-up that keeps producing every few months? If so, you’ll want to have a veg room and a flower room. The veg room can be used to store a mother plant, clones and plants in the vegetative state. Do you have a source for cloned plants? If so, maybe you’ll plan to just purchase female clones when you are reading to start your grow. Will you buy seeds? If so, if they aren’t feminized seeds, then you’ll have a good chance of males being present. We recommend not using a feminized or auto flower seeds. We recommend hybrid (mix of Sativa and Indica) genetics that have proven results indoors. Buy a hand full and choose the strongest of the batch. Label each, take cuttings and clone each, and then after you start to flower the original seeds you’ll know which of your clones to keep as the mother plant. Choose the strongest female. The process takes time, be patient, the females will have white hairs, while a male will have small pollen sacks. Males plants are useless unless you plan to cross breed – remove all males.
2) Plant Strength: If possible include some direct air movement across plants to help build root strength (this simulates a natural windy environment). Some advanced growers believe it’s important not to start your grow in a large pot, but to start small and re-pot as necessary. It’s believed to make for a stronger root ball.
3) Should I use any advanced growing methods like LST, SCROG, SOG, Super Cropping, or Topping? Sure, if you want, however it will increase the chances for failure. We would recommend only using one plant to test if you are new to any of these techniques. Note, that for extra yields in an indoor environment these types of techniques become necessary. Low Stress Training (LST) would be our recommendation for the best advanced technique to practice. LST tricks the plants auxin hormones into going through-out the entire plant instead of just the top. The method is achieved by bending the top of the plant down to the grow surface. The result is a bushier plant with the potential for more tops being exposed to light.
4) Should I trim undergrowth? We do not recommend much trimming, if you believe it’s absolutely necessary, then only a few branches at a time per plant.
5) How do I know when to harvest? First, know your genetics – there is usually an average amount of time in flower; a general average is 60-days.
White pistils in the flower will start to turn more orange, then red and brown when it’s time to harvest. Please factor in that during the last two-weeks the proper method is the flush the plant free of nutrients so you’ll want to keep a close eye on the color change and plan your feedings accordingly. A plant should be harvested when 3/4 of the flower pistils are red and brown or when using a magnifying glass the trichomes are creamy or milky white.
6) How do I dry and cure my plants? Once you decide to harvest, trim any unwanted fan leaves and hang the plants upside down in a dark 60% humidity environment, with good air flow it will take 4-10 days to dry. When the plant is dry and ready to cure when you can bend and crack an internal stem, if it doesn’t crack then there is still water inside. The curing stage helps the flavor and is accomplished by placing the plant in a jar and opening once a day for a few weeks until the texture is sticky.


Have also done some research myself in this area. My results were encouraging .As a ” rule of thumb ” it seems that the LED is roughly 4 times more efficient than other light sources .I used an array of 30 X 3 watt downlights .They were simply 12v “daylight” LED’s we sourced from china that had high output and were within the correct spectrum .The measured Lumen output was equivalent to a 400 Mih lamp . In a controlled and well established grow room the array performed as well as the Mih . 2 crops were turned using the Led array , As winter approached the growth rate slowed dramatically .We realised that the problem was a lack of heat .I found that providing about 300 Watts of incandescant lamps for warmth got things moving again , but alas was back to square one with the power consumed ! Just sayin is all.
Interesting. Thank you for responding with your feedback. So, it seems the extra heat from standard lighting sources helps in the winter when the ambient is lower, and the LEDs help in the summer when the ambient is higher. Ideally the grow room temps should remain constant no matter what season, but I do confirm we have heard similar things. Did you only use daylight color LEDs? -LEDSupply