


DIY LED AquaPOD Reef Tank
AquaPOD Reef Tank MOD with LEDs

Skill Level:
INTERMEDIATE
Estimated Time:
1 Weekend
Cost:
Under $400
Tools
Drill
Screwdriver
Wire Strippers
Solder Iron
Materials
12PCS:
Royal-Blue Cree LED - #CREEXPE-ROY-112PCS:
Cool-White Cree LED - #CREEXPG-W1394PCS:
Wired BuckPuck - #03023-D-E-1000P2PC:
24VDC Power Supply - #24VDC45A1PC:
MakersLED Heatsink - #MAKERSLED1PC:
Thermal Grease or Epoxy - #ASTA-7GN/A
If you are upgrading from a power compact lighting system, do not run the LEDs at full power. Use the supplied dimmers to decrease the light output to, roughly, 25%. Each week, increase the output another 25% until at full capacity. Corals cannot adapt to light changes as fast as other light-consuming life forms. They can and will bleach or die if shocked with too much light.
You may want to mount the dimmers on the outside of your fixture to make them more accessible. LEDs will last far longer than any other lighting option on the market, today. The LEDs are rated at 35,000 hours at 1000mA. Theoretically, this means, at 10 hours per day of light, the LEDs will last 10 years. How many halide and PC bulbs will you purchase in that amount of time? ENJOY!
Step 1

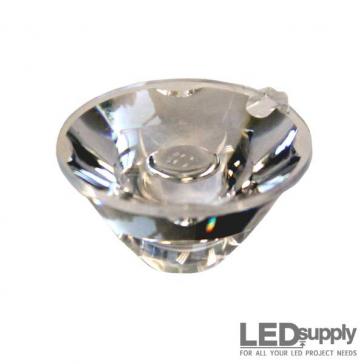
 Note: If you do not plan on using optics or lenses on your LED fixture, you may place the LEDs, center to center, up to about 3 inches apart. When using lenses, however, you need to keep the LEDs as close as possible to each other as they can create what appears as spot lights of white and blue if spaced too far apart. The use of optics is completely up to you. They do make the light brighter because they focus the beam of light but that is also their downfall. In a reef aquarium, focused light can be very unattractive. Once your grid is created, it may look a little cluttered and confusing. Some rubbing alcohol and a cotton swab will remove any extra lines and mistakes.
Step 2

Now that your LED positioning is complete, you will want to start adhering the LEDs to the heatsink. Before permanently affixing the LEDs, make sure they are placed properly. All of the positive (+) sides of the LEDs need to be pointed in the same direction. This makes wiring easier. Alternating white and blue in rows of 6 allows for proper mixing of the two spectrums of light. In the photo below, the LEDs with white centers are the royal blue LEDs and the yellow centers are white.
Step 3

When you have lined up the LEDs and are ready to make their placement permanent, start mixing a small amount of thermal epoxy. Do not mix large amounts. The epoxy will start to cure within 5 minutes so a large amount will cure before it can be applied. Only apply a small dab of epoxy on each LED at a time. Once the epoxy is applied to the LED, place it back into position and press down for a few seconds to push out any air and to spread the epoxy evenly.
Once the LEDs are mounted and the epoxy is cured, you may begin soldering. Because a grid was made to space the LEDs evenly, lengths of wire may be precut to speed this process up. Measure the length of wire needed to bridge the gap between the negative (-) side of the LED and the positive (+) side of the next of the same color. Since the LEDs are alternating, the wiring will look much like a shoelace when complete. When you have figured out the length of wire needed, begin making more of the same length. Each string of 6 LEDs will need 5 lengths of wire.
Step 5

Now is the time to plug in your soldering iron and let it heat to full operating temperature. Take each length of wire and strip about 3/16” off each end. You, now, need to start the process of “tinning” the ends of the wire and the LED contact pads. Heat the ends of the wire and apply just a touch of solder to the tip of the iron and the wire at the same time. This is done correctly when the solder appears to soak into with strands of the wire. After the wires are tinned, the LED contact pads are next. DO NOT leave the soldering iron on the contact pad for too long. A few seconds is all this process should take. Touch the contact pad that the wire will be making contact with and quickly touch the solder to the pad and the tip of the iron at the same time. The solder will adhere to the contact pad and form a small solder lump. Start applying the wires by touching the tinned wire to the solder lumps and press the iron down to the two surfaces. Once they melt together, remove the iron and let the solder cool.
Step 6

 Complete for the remaining LEDs as seen in images 6 and 7.
The ends of the LED strings are connected to the buckpucks later on. For now, differentiating the positive and negative ends of each string and placing them where they are convenient is the key. For this fixture’s application, routing them through the heatsink was the only option. Drill a small hole, just big enough for the wire to pass through on the heatsink for each wire that must be hidden. Be sure to drill these holes between the fins of the heatsink.
Step 7

The next step is mounting everything into a fixture or deciding how you will hang the light. The easiest for this application was building a wood canopy for the aquarium. If you choose this route, ensure there is enough room for the heatsink and buckpucks along with all the wiring and fans if you choose to use them. The LED leads must be soldered to the blue and white leads from the buckpucks. The black and red leads from the buckpucks go to your power supply wires (lamp cord). Using heatshrink tubing to secure the soldered wires is recommended. Once all the connections are made, use hot glue to keep it all in place.
Step 8

If fans are to be used, make sure proper ventilation is considered. Air needs to enter and exit the enclosure freely. The fans in this application run on 12V. To use them in a 24V system, they must be wired in series. This means that the positive of one fan is connected to the negative of the other. The remaining positive and negative leads are now the proper way to connect the fans. Running them in series allows for shared power between the fans. 24V is, effectively, shared, allowing the fans to run at 12V. Mount the fans so they are blowing air toward the heatsink fins. The use of the fans is highly recommended for more efficient cooling.
Step 7

Supplying power to the LED fixture is done by the two 24V power supplies. Each power supply should be connected to a different color of LED. One power supply, for example will only control the blue LEDs. Wiring the power supplies in this manner will allow for dawn/dusk effects with a light timer that supports this function.
Wiring the power supplies is relatively easy. The AC side of the power supply is labeled “L”, “N”, and “FG”. The 3-prong power cables have 3 wires: black, white, and green. Black is hot “L”. White is neutral “N”. Green is ground “FG”.
Final
Fans are considered to be optional for this project but they are strongly recommended. Keeping air flowing over the heatsink ensures cool operation. Two 80mm Apevia fans, model: CF8S were used. When choosing fans for a project like this, noise is a concern. These fans are rated at 16.6 decibels, which, is extremely quiet. Any fan over 30db can be noisy in this application.
Each buckpuck can handle 32 volts of DC power. Each white LED uses 3.3 volts when driven at 1000mA. Each royal blue LED uses 3.5V. 24 Volts will drive 6 LEDs with ease. Buckpucks require 2 volts of power to be able to supply power to the LEDs. Therefore, a 24V power supply is really supplying 22V. Each set of 6 white LEDs requires 19.8 volts and the blues require 21V. Also, using 24V makes wiring fans later on far easier than 32V.
Before connecting the lamp cord to the power supply, check the output voltage of the supply to ensure it is supplying 24V. This step can be considered optional if you completely trust the quality control of the power supply manufacturer. It is unlikely that the voltage will vary, but it is possible.
Once you have checked the voltage, attach your positive and negative leads to the power supply. You are now done with the wiring. Once you have mounted the fixture securely, you are all set.
If you are upgrading from a power compact lighting system, do not run the LEDs at full power. Use the supplied dimmers to decrease the light output to, roughly, 25%. Each week, increase the output another 25% until at full capacity. Corals cannot adapt to light changes as fast as other light-consuming life forms. They can and will bleach or die if shocked with too much light.
You may want to mount the dimmers on the outside of your fixture to make them more accessible. LEDs will last far longer than any other lighting option on the market, today. The LEDs are rated at 35,000 hours at 1000mA. Theoretically, this means, at 10 hours per day of light, the LEDs will last 10 years. How many halide and PC bulbs will you purchase in that amount of time? ENJOY!


- Low Prices
- Knowledgeable Support
- 100K+ Orders Shipped
- Free Shipping
- Bulk Discounts
- 2,000+ 5-Star Reviews
LEDSupply is built, owned and operated by a select few, all with technical backgrounds and over 50-years combined experience in the LED industry. Click here for more about us.


Shipping
LEDSupply does NOT profit from the shipping or handling of your order!
Orders received before 3PM EST will be safely packaged and quickly shipped the same business day. If your order is NOT shipped the same business day, LEDSupply will offer a 5% discount off your next order.
All orders SHIP FROM:
296 Beanville Road
Randolph, Vermont 05060
See respective ZONE maps below for SPECIFIC delivery time to your location:
Any order that does not qualify for free shipping, will by default include a discount of equal value to the free shipping offer.
The shipping offered is meant to provide the widest variety of shipping options at the lowest price:
USPS Priority Delivery Zone Map:

FedEX Ground Delivery Zone Map:

UPS Ground Delivery Zone Map:


