


Do-It-Yourself Closet Lighting: Motion Activated LED Light
Skill Level:
EASY
Estimated Time:
10-20 Minutes
Cost:
Under $49
Tools
Scissors
Exacto Knife
Pencil
Screwdriver
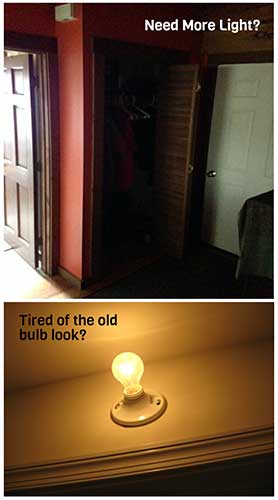 We have all been there, attempting to find something in a dark or dimly lit closet but need a flashlight to navigate through the dark abyss. Many shallow closets within households have no lighting, relying on other light from around the room. Either that or they have the infamous incandescent bulb and pull string which can get in the way and become a hazard in tightly packed spaces. This DIY post will go through how to add a safe, battery operated LED closet light in under 20 minutes!
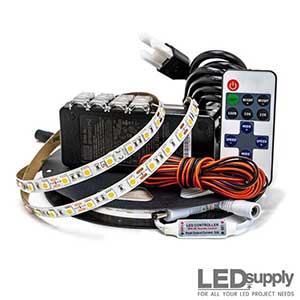
The Motion Activated LED Strip kit has all you need to create a quality light in that dark closet. The battery-operated flex strip light is discrete and comes in different sizes that can be cut down and customized depending on the closet. Say goodbye to annoying switches and forgetting to turn the closet light off. This closet light has a motion sensor that turns the light on automatically upon entry and will turn off after 10 seconds of no detected movement.
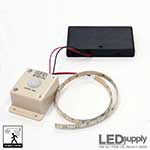 What Comes in the Kit? The motion activated LED strip kit can be bought here. The kit comes with 3 main parts:
- 8AA Battery Holder
- Motion Sensor
- LED Strip (20 inches up to 16.4 feet)
These parts come with adhesive backing for fast and simple mounting. They are all connected through the screw-in terminals on the motion sensor which are small and discrete, making for a near wireless LED closet light. For this particular project stick with the high density LED strip. The only pre-purchase decision for this project is finding what length of strip is best for the closet. Select the length that suits you best, remembering the strip can be cut down every 2-inches, allowing for more customized sizes if need be. Batteries NOT included…the one thing you will need are batteries to power the strips which will last about 15 hours on one charge. This should last a while considering the motion sensor will cut the power whenever the closet is out of use.
Step 1
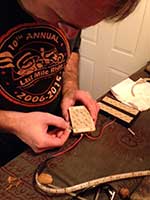
Battery Power: Take the battery pack and make sure that the toggle switch is set to the OFF position. Slide the cover off and fill with 8 AA batteries; the flat side of the batteries always goes up against the spring inside the battery pack.
Step 2
Connecting all the parts: Now that the battery source is ready to go, it is time to connect all the parts. First connect the battery pack to the motion sensor: use a flat-head screwdriver to lift the terminals, then connect the Black wire from the battery pack to the Input V- terminal and the Red wire to the Input V+ terminal. Use the screwdriver to tighten the clamps to make a solid connection, holding the wires in place.
Next take your LED strip which will have 6-inch wire leads on one end. Connect the wires into the output side of the motion sensor switch. Once again, Black to V- and Red to V+.
Step 3
Testing and Troubleshooting Bad Connections Before moving onto step 4, test the lights by flipping the toggle switch on the side of the battery pack to the ON position. Move in front of the motion sensor to make sure the lights activate and work as they should. If they light up, move onto the next step.
If they are not lighting up right away, first ensure that all batteries are in the correct placement within the battery holder. The negative (flat) end should be on the spring contacts for all 8 batteries. If that does not fix the problem then make sure that all wires are in the correct place (Red to +, Black to -). As a last check make sure that the terminals are tight against the wires and are contacting the stranded wire, not the protective covering. Strip back the coating if need be with wire strippers.
Step 4
 Testing the motion sensor position for closet This is probably the hardest step in the installation which is a bit of a stretch to call it hard…this step might just be easier with a helper. This step ensures that the motion sensor activates when the closet light is needed. The motion sensor is a simple switch that has a dome ‘eye’ that will turn the switch on when movement is detected, and off after ten seconds of no movement.
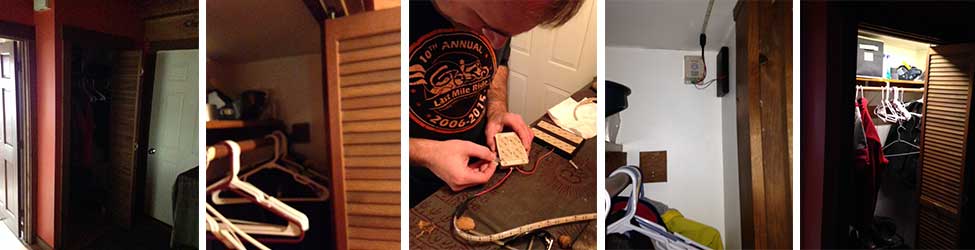
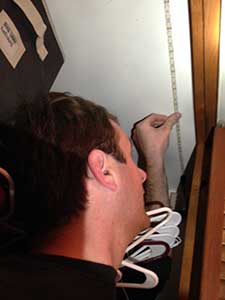
The placement of the sensor is important for a motion detected closet light because you want it in a place that will catch movement as soon as you enter the closet or open the closet door. In the pictured application there needed to be precise placement as there are slots in the door. This meant that if the motion sensor was placed right in front of the doors it would detect movement when someone walked by, turning the light on when it was not needed. To run as efficient as possible, the goal should be to eliminate this.
The best placement for motion activation is to use it as a door sensor. Place the switch where it will catch the door motion as soon as it moves for instant light. This is the cleanest and most attractive way as the switch will activate and turn the light on before you even notice it was dark to begin with. In this installation, the sensor was put in the back corner. This way it would not catch the motion of people walking by but would activate as soon as the sliding door opened as it detected movement from the side.
To test the placement of the sensor it is best to switch the battery pack on and hold the sensor up in the desired place. Stand still and have another person walk around in an area where you do not want the light to activate. Make sure the motion sensor is in a spot that does not see movement in that place. Next, make sure the light activates when a door is opened or when someone enters the closet. Once you find the best placement for the sensor, mark the spot with a pencil.
Step 5
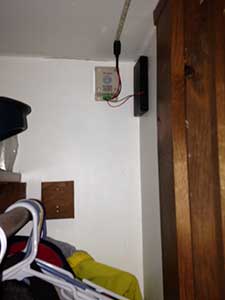
 Mounting the motion sensor and battery pack: Now that all the testing and planning is done, we can mount the sensor. Take the backing off the double sided tape on the back of the motion sensor. Sometimes using a razor blade or sharp edge will help lift the backing off. Once the sticky side is uncovered, firmly press the switch against the spot marked with a pencil for the motion sensor.
Follow the same steps for the battery pack and mount close by the sensor. Make sure to mount higher up so there aren’t wires running everywhere and you get the wireless LED closet light that is meant for this application.
Step 6
 Mounting stick on LED strip lights: All that is left to mount now is the 12 volt led light strips. Peel the backing off the light strip slowly as you firmly press the strip up to the ceiling in a straight line. You will want the strip towards the front of a shallow closet (as pictured). Putting the strip about 6 inches from the front of the closet would work in this application. If you are questioning where to place the light, remember that ideally you want the light where it will cover the most area or the targeted area you need lit.
Step 7
Test your new motion detected closet light: Make sure the switch on the battery holder is switched to on and test your light a few times by entering and leaving the closet.
Congratulations, you have solved that tricky closet lighting problem with an efficient and cost effective solution!


- Low Prices
- Knowledgeable Support
- 100K+ Orders Shipped
- Free Shipping
- Bulk Discounts
- 2,000+ 5-Star Reviews
LEDSupply is built, owned and operated by a select few, all with technical backgrounds and over 50-years combined experience in the LED industry. Click here for more about us.


Shipping
LEDSupply does NOT profit from the shipping or handling of your order!
Orders received before 3PM EST will be safely packaged and quickly shipped the same business day. If your order is NOT shipped the same business day, LEDSupply will offer a 5% discount off your next order.
All orders SHIP FROM:
296 Beanville Road
Randolph, Vermont 05060
See respective ZONE maps below for SPECIFIC delivery time to your location:
Any order that does not qualify for free shipping, will by default include a discount of equal value to the free shipping offer.
The shipping offered is meant to provide the widest variety of shipping options at the lowest price:
USPS Priority Delivery Zone Map:

FedEX Ground Delivery Zone Map:

UPS Ground Delivery Zone Map: